Friday, February 23, 2007

Old Log Cabins

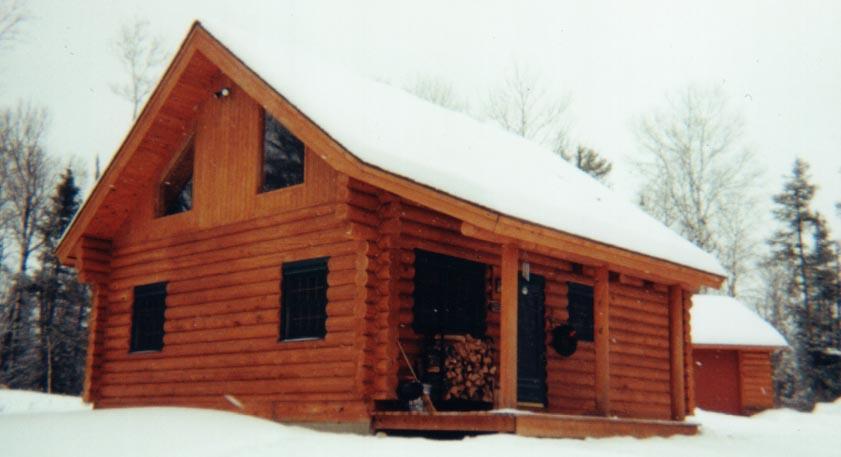
For your viewing pleasure. Some photos of old log cabins of friends, family and local folks.

Some of these cabins look virtually identical, but if you look closely you can see the differences. Most date from the mid 1800's to the early 1900's.

Please keep in mind that during the Great Depression it was common for people to make a living by trapping and living off the land.

Wednesday, February 21, 2007

Winter Preparations

We frequently visit our cabin during the winter months, so preparations for winter are fairly simple. We know there will be many days when the temperature drops below freezing and even below zero degrees, so precautions must be taken with anything that can freeze.

The first items to consider are the food items . We remove all canned and bottled goods as they will certainly freeze. Some dry goods, such as dry soup, flour, sugar, dry cereals, etc. can be stored in metal or glass containers to prevent any insects, mice, etc. from enjoying them. The covers should be tight fitting.

The blankets and bed linens are laundered and those which are not on the beds are stored in a large trunk or hard plastic boxes. (Once we had moths enjoy the flannel sheets and a cotton blanket.) It is too much work to put all the bedding and blankets away each time we leave, not to think of the work in making all the beds when we revisit the cabin.

As our main source of heat is the wood stove, we always fill the wood box and the log holder on the porch before we leave so that starting the fire will be easier. We also have a kerosene heater which we start as soon as we arrive as the indoor temperature is about the same as outside temperature. We need to be sure we have a good supply of kerosene available.

All the food is removed from the refrigerator. The refrigerator is turned off, disconnected and cleaned with the doors propped open to prevent mold and odor build- up. We have found that our refrigerator starts better if we first turn off the appliance and then unplug it.

Finally, as discussed in this link to a previous post, the water lines are drained and antifreeze added to the toilet, toilet tank, the sink drains, etc.

Tuesday, February 13, 2007

The Ants Go Marching One By One

As soon as the hornets had been dealt with.....large ants started to appear on the exterior and interior log walls of the cabin. We captured a few of the ants and placed them in small glass containers and sent them to the University of Minnesota for exact identification.

The University Extension Entomologist indicated they were carpenter ants.

Carpenter ants are destructive and can eat up the wood of the log walls. They seem to find the little cracks and openings in the wall and create hidden holes and tunnels within the logs if the wood remains moist and especially if wood rot occurs. Carpenter ants can enter the cabin walls many ways.

At first, we noticed a few ants marching across logs and then found wood shavings, mostly in one particular corner. We realized we needed to be concerned about this issue.

Our first attempt was to apply a liquid insecticide on the inside and outside faces of the log walls. Next, we tried a powder dust especially formulated for carpenter bees and carpenter ants. We used these treatments every 3 to 4 weeks during the summers, less frequently during winter months.

When the log cabin needed a re-staining, we tried an insecticide in the log finish.

In spite of all the attempts to rid the cabin logs of ants, we had little success. One very hot summer we noticed an increase in the number of ants both inside and outside the cabin. As there are many rottings logs in the forest, we could not find their nests in the woods. To our amazement and amusement, we watched as the army of ants marched one by one back and forth across the sandy soil surrounding the cabin. Hundreds of ants were actively working that day.

Something further needed to be done!

We happened upon the cabin's original builder and told him of the carpenter ants. He suggested that I go to a particular small, local store and get a liquid concentrate there which is mixed especially for carpenter ants.

We stopped by the store and asked for the carpenter ant concentrate. The store clerk knew exactly what we wanted and poured a small amount of the mysterious concentrate into an old glass quart jar. The jar cover did not matched the jar. So, in an attempt to seal the improper cover to the jar, the store clerk placed some waxpaper over the opening of the jar before putting on the lid.

We were on our 3 hour return trip back to the city from the cabin when we purchased the concentrate. A number of miles down the road, we were overwhelmed by a strong, pungent odor coming from the back of our van. We guessed it was coming from the jar of concentrate with it's imperfect lid.

We stopped on a gravel road just off the highway. We couldn't drive all the way back to the city with the smell......how do we do eliminate the smell? We didn't have any other jars or containers in the van with a better closing lid.

After some discussion, we decided to place the jar of concentrate with it's faulty cover under a nearby small pine tree in the forest, about 20 feet from the edge of the back woods road. I placed a flat rock on top of the cover of the jar to hold the jar upright and keep an accidental bump from knocking the jar over. We decided we would plan on picking up the hidden jar on the way back to the cabin the next week end.

A week later we did go back to the cabin and stopped by the small pine tree in the woods to pick up the jar with the concentrate. It was still there! We put it into a new, larger plastic container with a tight cover and continued on our merry way up to the cabin odor free.

The concentrate was to be mixed with water in a 10 to 1 ratio. One ounce of concentrate and 10 ounces of water could be placed into our plastic spray container. We sprayed the mixture into the rock landscaping that surrounds the cabin, on the foundation, lower logs and the wood skirt board that was placed below the bottom wall log. This treatment appeared to be very effective.

Early this coming Spring we will spray this same insecticide to treat the cabin again. Here's hoping the march of the ants is a thing of the past.

Tuesday, February 06, 2007

Uninvited Guests

As soon as the cabin was finished, a number of uninvited guests arrived.

The ants, spiders, hornets, wasps, bees, deer flies and mosquitoes all showed their presence. Of course, the usual insects were there before us and we had to blend into their surroundings.

Summer is their season, but we can escape into the confines of the cabin interior. The screens are on the windows and a big fly swatter is nearby. We put sticky fly strips on the bottom of the high windows.

Everything seemed under control.

But, then the hornets showed up and built their nests at the soffits of the roof overhangs. They make their nests of hornet chewed plant fiber. The nests look paper-like. Every spring we expect a hornets' nest under one of the eaves of the cabin, garage, or wood shed.

The female hornet starts the nest and lays some eggs. The young become mature and become workers for the female hornet helping to build the nest larger, gather more food and have additional hornets. Soon, we had hundreds of hornets.

The hornets can be a needless pest and they can give painful stings to anyone who disturbs them. The stings are poisonous and can cause painful swelling. I have been stung several times by these critters.

I like to get rid of these uninvited guests by using "BLACK FLAG" spray that is made specifically to kill hornets or wasps on contact within their nest.

I dress head to foot with a long sleeved shirt , full length jeans and gloves and cap. I try to keep my neck and face covered as much as possible. At evening time, after sun set, when the hornets become least active, I give the hornet nest a good 2 to 4 second shot of the Black Flag. The spray coats the nest and saturates it, killing the whole nest and any hornets which return to the nest after the nest has been coated. This seems to control the hornet population for most of the season.

Other "uninvited" guests??? Yes!!! ......To be continued.

Saturday, December 30, 2006

Wood Decay

Wood decay is created by microscopic fungi which feeds on the starches and sugars that are in the wood. The fungi slowly destroys the wood cell structure of the log.

There are several types of decay fungi, but the prevailing cause of log damage is from brown rot. The wood appears brown and crumbly and looks unusually dry. Sometimes this rot is called "dry rot".

Wood decay fungi requires four conditions to survive: a warm temperature (about 70 degrees to 100 degrees F), oxygen, wood (food source), and water. Keeping the water away from the log contruction is the most effective means of decay control.

Of course, choosing the proper wood species helps control wood decay too. Wood species such as cedar, cypress, redwood heartwood are naturally resistant to decay and insect attack. The heartwood is that portion of the log that is the central column of wood that runs through the center of the log. The sapwood of the log is that wood that surrounds the heartwood and is less durable in nature. The sapwood is the light colored wood: whereas, the heartwood is the darker portion of the log.

The historic log structures of Europe, United States, and Canada are grand because of the virgin timber of years ago. These virgin timbers had large portions of heartwood, thus these log structures have stood for years. Some good examples are the Lodges of Yellowstone, Glacier, and Yosemite National Parks.

(Grand Canyon Lodge photo curtesy of the National Park Service. Photo by L.S. Harrison)

Thursday, December 21, 2006

The Anatomy of the Log

The choice of the log species used to build a cabin is determined by availability and the cost. The wood that is indigenous to the local area is a good choice.

It is best to have the logs winter cut and air dried. This will help reduce the overall weight of the logs for shipping and will aid in lifting the logs for construction. It will also help shrink the logs prior to setting the log in the log walls, thus reducing to precautions necessary to accommodate shrinkage and detailing around windows, doors, interior walls, etc.

When the moisture content of the logs gets below 19%, a large amount of the log shrinkage has been done. The moisture content is best measured by a moisture meter. It is ideal to get the moisture down to 15% or below to be sure the logs won't check. Of course, shrinkage will vary and will reach an equilibrium with the environment, and will have some differential moisture content between the inside and outside of the exterior walls. This differential is most pronounced during the winter.

This leads to the log profile (or how the logs join together). The choice of log profile and the wood species is important because some joining systems work better with some wood species than with others. As an example, Western Red Cedar is easier to cut to very close tolerances, thus making the tight fit between logs.

Another important factor of the log profile is the ability of the log to shed rainwater. If the log is milled to square or other shape other than round, it is necessary that rain water remain on the exterior face of the wall and not enter the joint between the logs.

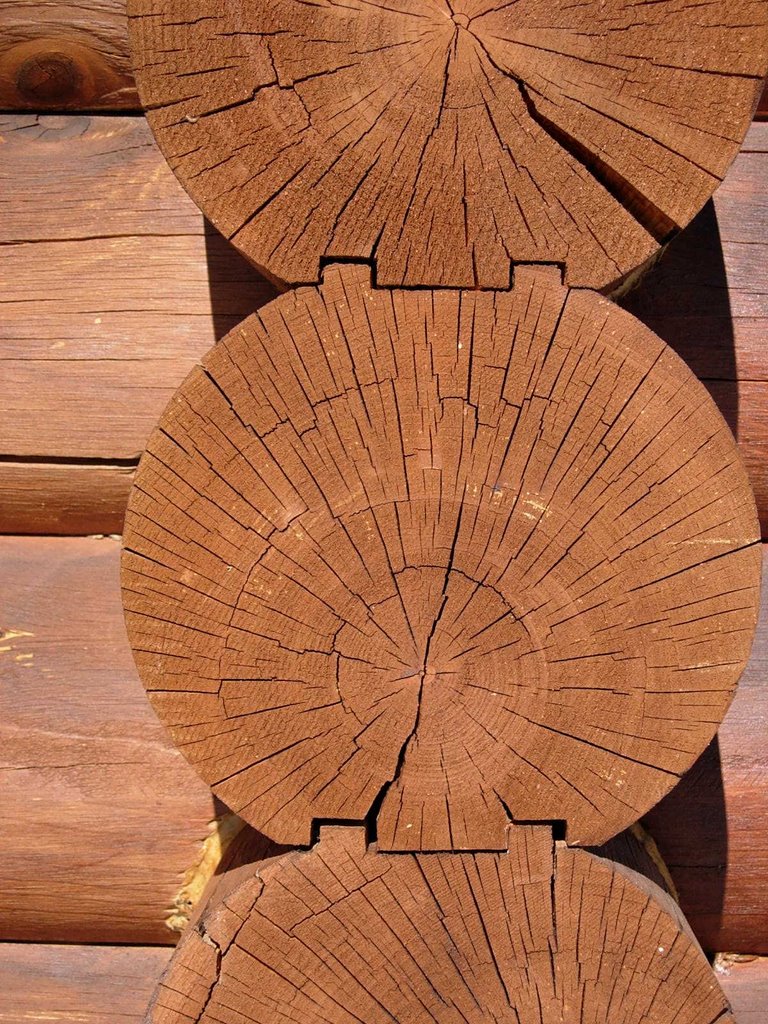
The log chosen for our cabin was a Red (Norway) Pine, indigenous to our area and was low cost. Western Red Cedar was an option, but more expensive. The log is curved both on the inside and outside of the log and has a flat top and bottom. The top has two tongues and the bottom has two grooves. The tongue profile matches the groove profile so as to fit together. During erection of the logs, two 1/8" Butyl Strips are placed on top of the two tongues to aid in fitting the joint together. (See photo of the log profile). The center of the log is very near the center of the cut profile which adds to the structural stability of the log wall.

Also, note that at the corners where the logs overlap, the log ends are flush and are not a butt and pass corner. Usually, the butt and pass corners permit weathering of the logs which will lead to log decay.

The log shrinkage in the exterior walls of the cabin was allowed to happen as vertical steel rods were placed in the wall corners and other locations that run the full height of the log wall thru vertical holes placed at the center of the logs. This wall shrinkage keeps the log to log joints tight and keeps the rain water out of the joints.

One possible problem with the double tongue and groove system (shown in the photo) of the cabin is that moisture can form between the grooves, caused by condensation in the winter time. The thin Butyl Strips tend to mitigate this potential problem. After ten years of the logs in place this condensation problem hasn't been detected in our cabin.

As an additional insurance, we applied a high quality stain sealer (High Sierra Log Stain) to the exterior of the cabin and caulking was placed in the exterior corners.

Friday, November 03, 2006

Lost

Some years ago, my mother and her friends planned a blueberry picking trip. They knew of a great spot in the woods near the old cabin where blueberries were abundant. The time was late August and the blueberries at the their best.

The blueberries are of low bush variety, several feet high and thick with many green leaves and when in bloom they have white or pink blossoms. The blueberries grow best in sandy or peaty soil that must be acidic and drained to a depth about 16 to 20 inches. The underlying soil below the sandy or peaty soil must have abundant mositure for the blueberries to thrive.

The group was having a great time enjoying the harvest of berries. Each of the group proceeded to pick, going in their own direction, spreading out and following where the best picking was. Soon the group was spread out, far from each other, but still enjoying blueberries. Time passed.

My mother found herself isolated from the group. She thought she could call for help, but there was no response. She walked back to where she thought her friends were, but couldn't find them. Evening was approaching. A little panic settled in.

My mother collected her thoughts and looked for a clearing nearby to sit down and rest. She had a nice pail of blueberries to eat when she felt hungry. Just, maybe, her friends would stop by or call. She waited. Darkness came. She curled up and fell asleep.

Her friends looked for her, calling her name, but could not find her. They called the sheriff's office and explained about the lost person. The sheriff stated that they would form a search party in the morning which included an airplane and pilot who was trained in searching for lost people. The area to be searched was somewhat remote, but well defined.

My mother was an experienced outdoorswoman and did not wander, but stayed near the clearing where she stopped early the previous evening. Morning came, and my mother awoke to the noise of a low flying airplane. She waved at the pilot and the pilot tipped the wings to acknowledge her wave. Within an hour the search party arrived. Needless to say, my mother was happy to see the group.

When she arrived home, her friends stopped by to ask about her night in the bush. She talked for hours about her adventure. She even got her story in the local newspaper. Mother was an ideal survivor in that she didn't panic, collected her thoughts, sat down and rested, had something to eat, and had a strong belief in her friends who would help in finding her.

Sunday, October 15, 2006

The Wood Shed

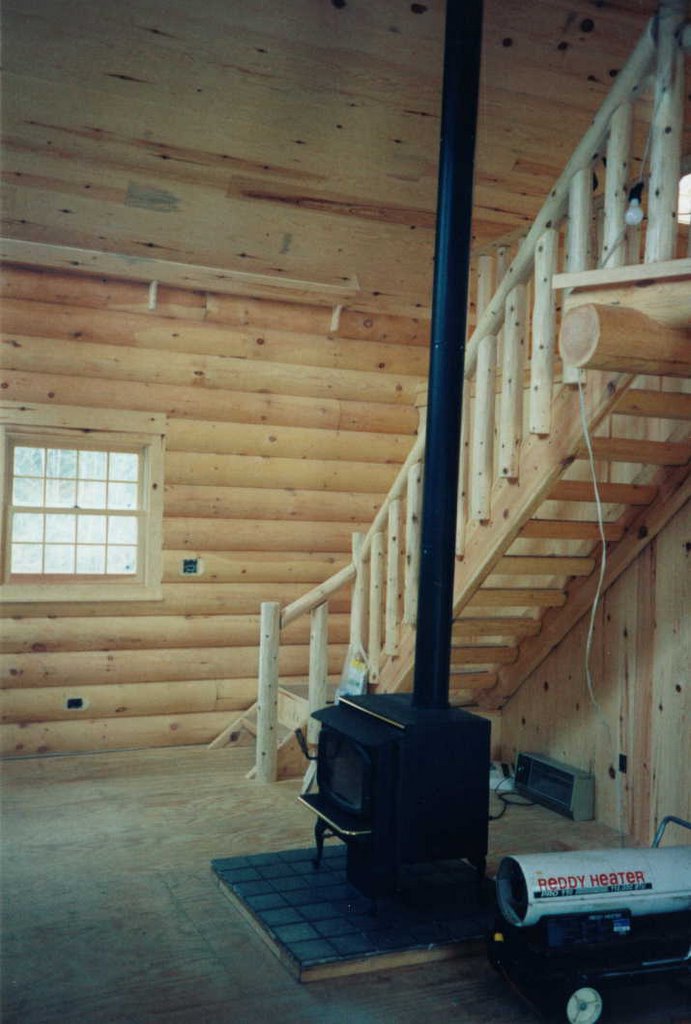
When the fall and winter months come to mind, our thoughts go to: "We need to cut some firewood." We have an Avalon wood burning stove that warms the cabin and has proven to be an adequate provider of warmth during the winter. The fuel for the stove is wood from the forest.

In the Spring of the year, we scout about for dead or near dead trees, fell them, and cut the logs into 16" to 18" pieces to fit into the stove fire box. Many types of trees are available, but we have been cutting maple, aspen, ash and birch trees. We prefer the hardwood such as oak, but oak is not available. The need for a wood shed was obvious.

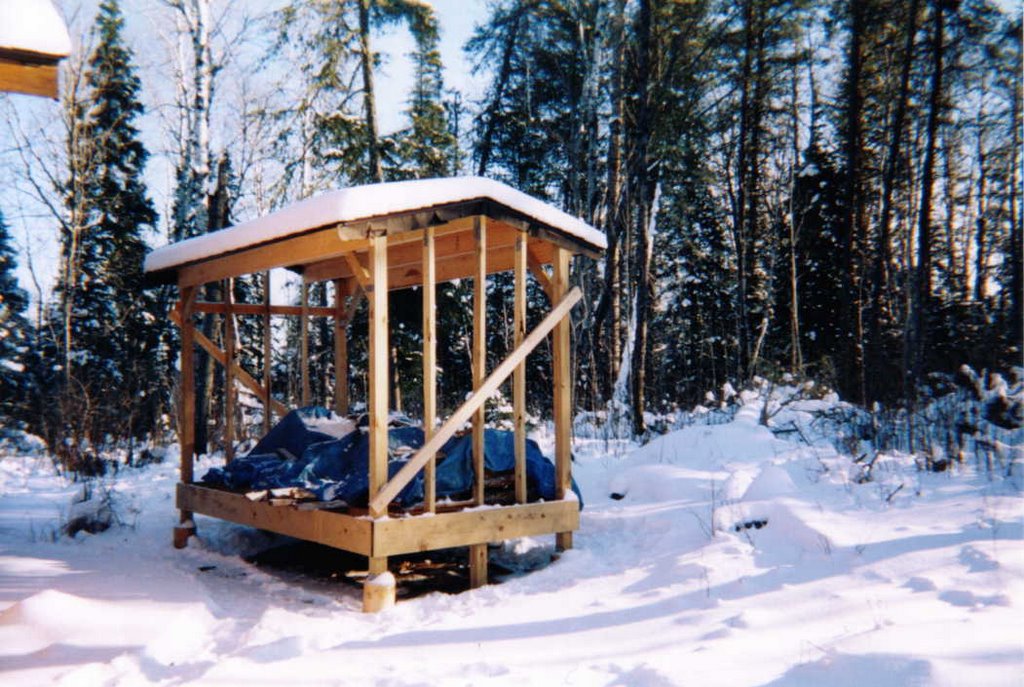
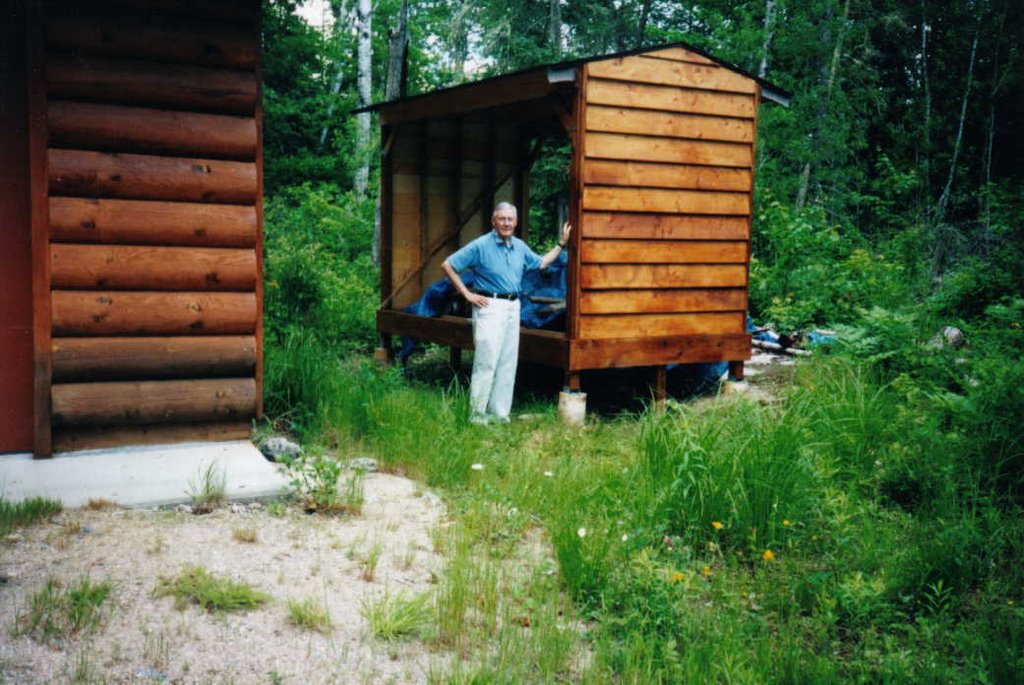
The 6' wide by 12' long wood shed is located about 8' from the garage. It is placed atop a sloping ledge rock: the same area we originally planned to locate the cabin. It is not the best place, but a good location and convenient.

Building atop the sloping ledge rock was a challenge. A level floor was desirable so, we cut 4 - 10" round forms (sonotubes) to fit the slope of the ledge rock. Jim, a friend who can solve the most difficult of problems, accepted the task of drilling four holes into the ledge rock for the vertical reinforcing rods, 1/2" in diameter. Jim proceeded with an electric drill and 1/2" diameter carbide tipped drill bits. The rock was very, very hard and the drilling very, very difficult. After many hours of drilling and wishing we had diamond tipped drill bits, we accepted about 1-1/2" deep holes. While Jim was drilling the holes, I busied myself by gathering the bags of sack-crete, the wheel barrow, shovel and water for mixing the concrete. We placed the reinforced rods into the holes and poured concrete into the forms (sonotubes). The tops of the poured concrete piers were now level and ready for the wood posts and other wood framing .

After waiting several days for the concrete to gain strength, we placed 4" x 4" treated wood posts atop the concrete piers and placed wood rafters to form the sloping roof. My daughter and I placed the plywood sheathing over the rafters and applied 30 pounds building paper. Next we nailed asphalt shingles (GAF, Timberline) over the building paper, forming a roof over the wood shed. The same shingles were used as were used on the cabin and garage. We also applied the same stain.

The capacity of the wood shed is about three regular cords of wood, but the usual load is less than 2 cords. It is most enjoyable to sit on the nearby couch and watch the wood burning in the fire box of the Avalon Stove. The heat is a radiant type of heat and feels more comfortable than convection heat. Grab a cup of coffee, a good book and savor the warmth of the stove.

Friday, September 08, 2006

The Boat(s)

Many years ago, my father owned a home-made 12 foot canvas covered boat with a 2 1/2 horsepower Johnson outboard motor. The boat and motor were used for years for fishing and lake exploration. The boat was light enough to be placed on boat carriers on top of the family car. My father sold the boat and motor in the late 1950's.

In the late 1940's, my dad and I took the 12 foot boat on a week long trip thru a number of large connecting lakes. We camped in a tent on some of the islands, caught some fish to eat and enjoyed being together. When we started out, the weather was nice, a little windy and sunny.

Later in the week, the wind picked up when we were crossing one of the large lakes. The waves grew into "white caps" and then into large rolling waves., That 12 foot boat did well in those waves. When we went into a wave trough, we could not see land. May dad had that 2 1/2 horsepower Johnson humming along just great. We both had our life jackets on and hoped we would not take on much water. Eventually, we reached a beach near a resort which my dad knew; and there we took on a big splash of water. We were safe and sound and waited out the wind storm at the resort. The people at the resort said that even the big boats would not go out into that wind storm.

After the wind storm subsided, we resumed out trip. On our way back to our point of beginning, my dad suggested that we portage the boat, motor and our gear. The portage was about 1/2 mile and required several trips. We placed a small wheel on top of the top deck at the bow of the boat. We turned the boat over, with the boat bottom upward. We both grabbed the stern transom and wheeled the boat across the portage. Another trip back, and our motor and gear were across the portage. We found the bay was very calm. We continued on doing fine, but the wind slowly picked up as we were going down the center of the bay toward the main part of the large lake.

All of a sudden, the boat landed atop a large submerged rock. The motor stopped and there we were!! We could not move. My dad suggested we get out the paddles.

The paddles were placed vertically, one on each side of the boat. My dad had one paddle and I the other. The paddle tip was placed atop the submerged rock and we waited for a larger wave. After a few minutes a large wave came along and my dad called out that we both push down on our paddles.

Alas the boat came off the rock. My dad started the motor and we both felt releaved and out of danger. The rest of the trip was without any major event.

We arrived at the public dock at our point of beginning . Here my dad ran into an old friend and they talked for at least an hour about our week long wonderful trip and that 12 foot boat.

In the 1970's I purchased a used 17 foot alumacraft canoe. I still have the canoe, but we don't use it much. It is ideal for portaging from one lake to another and for canoe trips.

I thought I needed a fishing boat and a larger outboard motor. A deal came up and I bought a used 14 foot boat with a console control system, a 25 horsepower motor and trailer . Big Mistake!!!

The boat size was too small for the large lakes in our immediate area. It would be okay for the smaller lakes, but not the big ones.

I traded the 14 foot boat, motor and trailer in for a new 16 1/2 foot Aumacraft boat, a new Johnson 25 horsepower and a new Shorelander trailer. The boat was wider and deeper with more stability. The boat came with cushion seats, fish well, storage compartments, night lights and bulge pump. Just enough items to add some comfort.

The 25 Horsepower Johnson is unique as it has 3 cylinders, in lieu of 2 or 4 that other motors have. It runs well, with ample boat speed.

Most of the boats and motors in the marine docks around, are larger with faster and more powerful motors. Motors up to 200 horsepower are not uncommon.

The lakes around our area are numerous; Almost a life time of fishing and exploration. Within a 15 mile radius from our cabin there are 25 different lakes of various sizes and shapes.

Sunday, June 25, 2006

More Construction - The Garage

Almost as important as the cabin is the garage - and storage. The accumulation of more possessions dictated the need for a garage and storage.

Garage construction is different than cabin construction. Deep foundations, insulation, and interior finishes can be omitted.

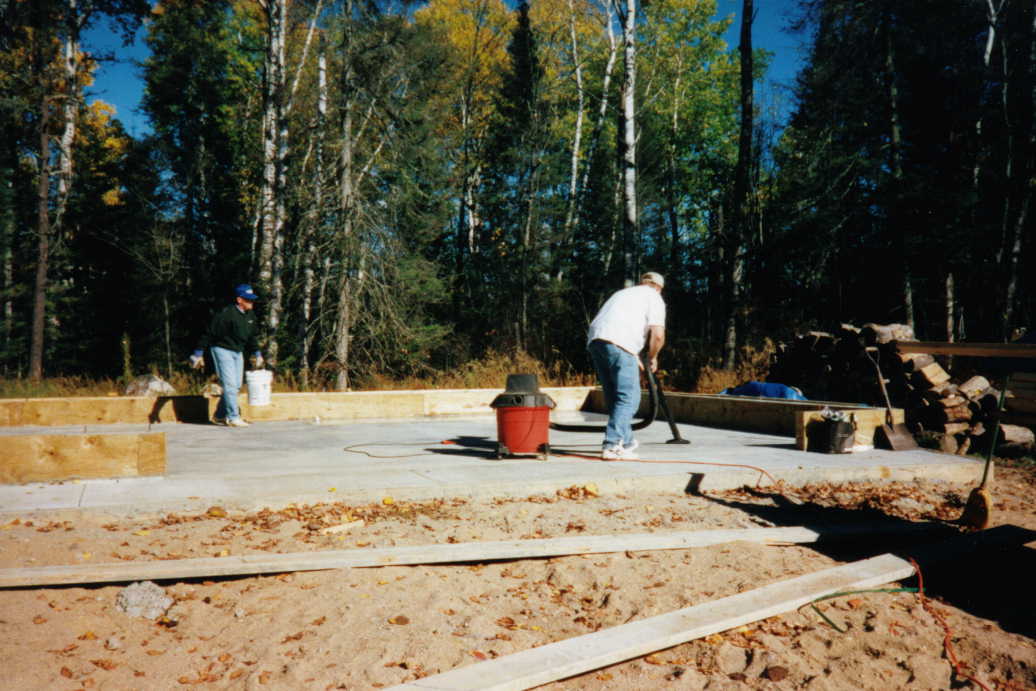
A 22 foot by 28 foot garage was built using the thickened edge of the concrete floor as the footing for the load bearing wood frame walls. A compacted sand and gravel fill was placed below the garage slab to support the slab and the garage structure and to keep any frost action from lifting the structure.

Pre-engineered roof trusses were used to span the 22 feet between the exterior bearing walls. A Micro-Lam beam was used over the 8 foot high overhead garage door.

So often the case, the beams over the 16 foot wide garage doors are undesigned. The potential snow loads on any roof are high in our area, as the building code would require up to 46 pounds per square foot of snow for the design of the roof trusses and supporting beams for garages.

Beveled pine boards were used on three sides of the garage and log siding was used on the front of the structure. The log siding recalls the log structure of the cabin. The stain used on the garage is the same as used on the cabin and the roof shingles are also the same. The service door is painted green to match the door to the cabin.

When the floor slab and concrete apron were poured, I was surprised when the contractor did not use any curing method to help cure the concrete. So, I quickly applied a coating of water over the top of the slab and then a covering of contruction plastic was placed over the entire slab. A curing method should have been applied to minimize potential slab cracking of the concrete which happens when a rapid evaporation of the water in the concrete occurs.

Some small cracking did appear in the slab after a number of days. After about a month of curing, a high quality penetrating sealer was applied (Hydrozo Clear 650). This sealer acts as a water repellent sealer which prevents water, salts, acids and freeze - thaw cycles from deteriorating the concrete.

The 220 volt electric wiring was extended from the cabin into the garage. A number of ceiling lights were installed along with a number of electrical outlets. An outlet was installed near the overhead garage door for a future garage door opener.

The garage is a great addition to the property as it provides cover for a boat and motor and a number of other items, such as a work bench and storage, a lawn tractor and small wagon, snow blower, and of course a place for the family automobile.

Tuesday, June 20, 2006

What Shall We Fish For?

June is a good month for fishing in this northern climate. Our favorite fish is the walleye or walleye pike, a member of the perch family.

The walleye pike is common in the Great Lakes and the Upper Mississippi Valley area. The walleye likes clear water with rocky or sandy lake bottoms. Its size may be anywhere between 2 to 20 pounds. The most common length is 10 to 12 inches. The walleye may be caught with a simple pole and hook. It is easy to catch, and will bite almost on any kind of bait and may be caught any time of the year.

The walleye that weighs about 2 to 3 pounds is the best eating. It has a very pleasant taste for a fish and has few bones.

It is best to fillet the fish before cooking the fish in a fry pan or grilling. My own preference is to grill the fillets.

Of course, northern pike, bass, crappies, etc. are all fun to fish and are good to eat; but walleye pike is the local favorite.

Friday, May 12, 2006

Fishing Opener is May 13th

Anglers who are heading to the lake for the Minnesota fishing opener should get their fishing license as early as possible. The DNR stated that those fishermen would avoid long lines and possible glitches.

Vendors, who sell licenses, use a dial-up system to the DNR. The telephone system in some northern commumities recently went down sporadically. The telephone problems have been solved, but overload on the DNR system may happen as thousands of licenses are purchased early tomorrow.

GOOD FISHING!!!!!

Sunday, April 30, 2006

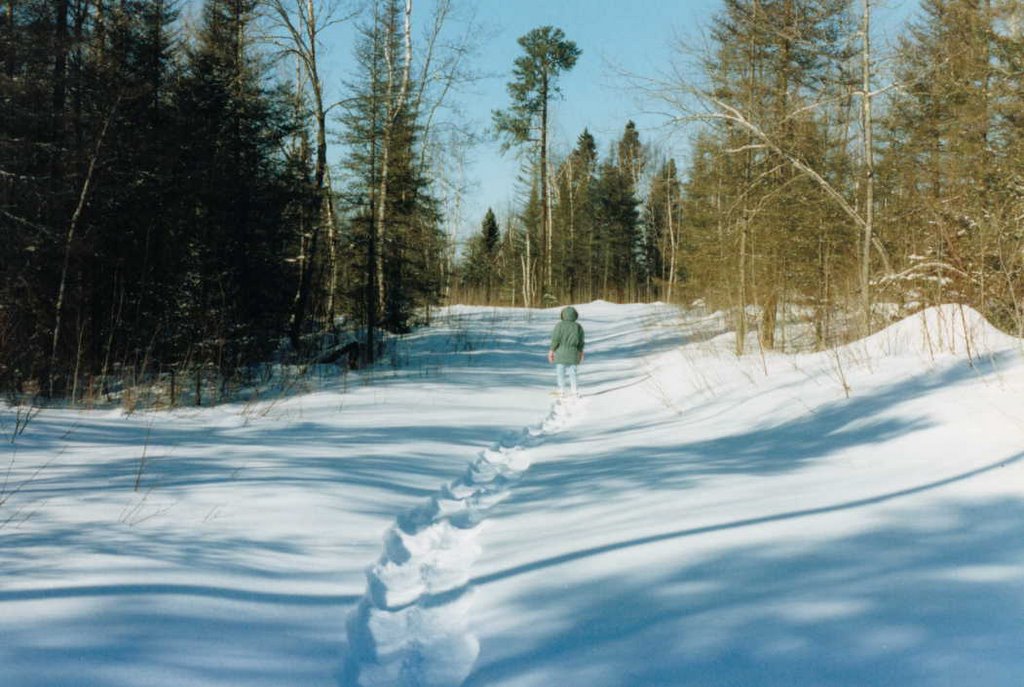
Making Tracks In The Snow

A snowshoe is an odd shaped device that permits a person to walk over deep snow without sinking into the snow. The snowshoe distributes a person's weight over a large area. The adult snowshoes are about three feet long and a foot and a half wide. Children's snowshoes are smaller as their weight is less than an adult.

The traditional snowshoes are made of a light weight wooden frame, bent into a long oval. A weave of strings of raw animal hide are stretched across the frame. The strings are tied to the wood frame and both are coated with several coats of water resistance varnish. Native Americans were the first to use snowshoes in the regions of deep snow. Many of the traditional snowshoe shapes are modeled after these early Native American snowshoes.

To walk with snowshoes, one moves their feet so that the snowshoe glides over the surface of the snow. An outward motion to the snowshoe with each forward step must be used. With practice, one can cover many miles over the snow. It is an excellent form of exercise, different than walking, but is most enjoyable; as it gives one the ability to view the wonders of the winter forest.

Today, modern snowshoes are made of light weight tubular metal shapes and wide plastic webbing similar to the tranditional snowshoes. The modern snowshoes have small and different shapes and other accessories to aid the user in snowshoeing, especially when climbing or going down hill. Our traditional snowshoes seem to support us better without sinking deeper into the snow than the modern metal snowshoes.

It is magical to walk in the deep snow with snowshoes at night, especially when the moon is full. The snow glistens from the light of the moon. The snowshoes steps make no sound and the dark shadows of the winter forest seem ghost like. It is a scene that shines with a luster with a dropback of the large pine trees that appear as silent sentinels against the sky and the sparkling snow.

Saturday, April 15, 2006

Chicken and Egg

We started looking at furnishings for the cabin in the antique stores in our area. We did find an antique wood box which we purchased to keep logs near our stove. We also looked at mission furniture.

An ad in our local newspaper caught our eye. A local liquidator had log furniture for sale. Our visit to that store changed our mind about the style of furnishings to buy. The prices were great, so, a log bed, log desk, night stand, and two chairs were purchased. Another trip back, and an additional night stand was purchased. All the log furnishings were "Chicken & Egg"; a high quality log manufacturer from the West Coast.

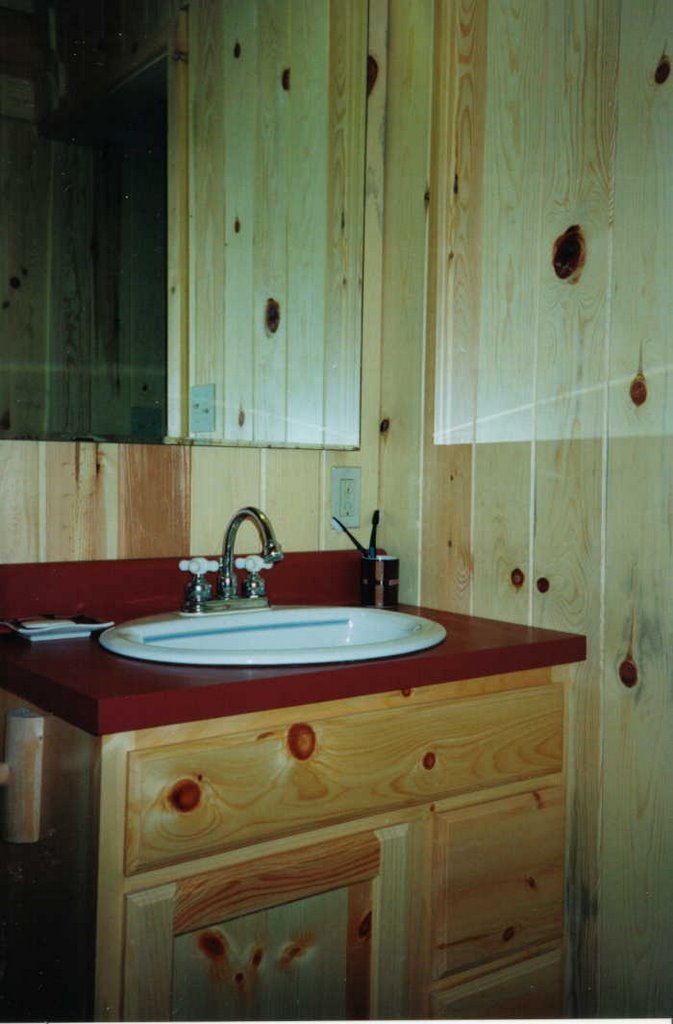
I had planned to remodel the second night stand into a bathroom vanity, so I cut a circular hole in the top to receive the bowl, but waited for the faucets to cut the piping holes. I set the remodeled night stand aside for a time.

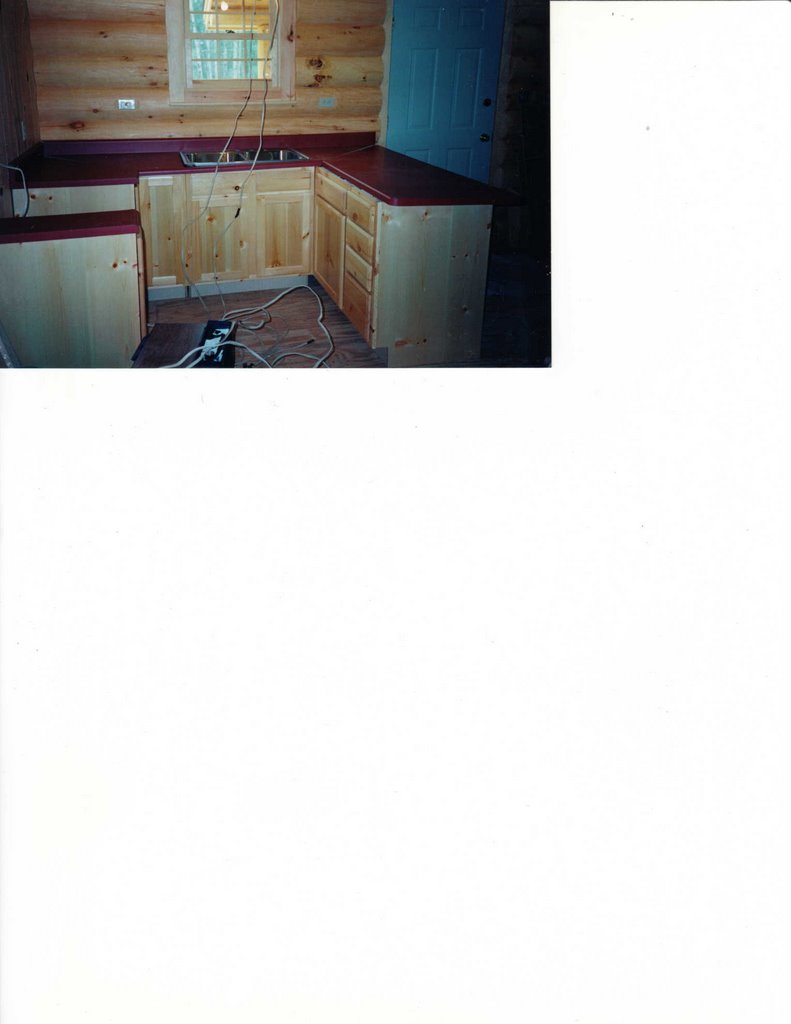
The next step was to order the kitchen cabinets. Our orginial kitchen layout was small and when we ordered the cabinets, the vendor extended the base cabinet several feet . We ordered a vanity base to match the kitchen cabinets. I had forgotten the circular hole that was cut into the night stand.
When the kitchen cabinets arrived for installation, a new vanity base was also there. OOOOOPS!!! Now two vanity bases existed. A confused builder called us wondering how the two vanity bases were to be used. The vanity base from the kichen cabinet store was chosen for the bathroom and installed.

The remodeled night stand was converted back to a night stand by inserting the circular cutout back into the hole. We covered the cut mark with a cloth and the first night stand is back in use.

We are pleased with the appearance and comfort of our log furniture.

Monday, March 20, 2006

Our Elephant Burial Mounds

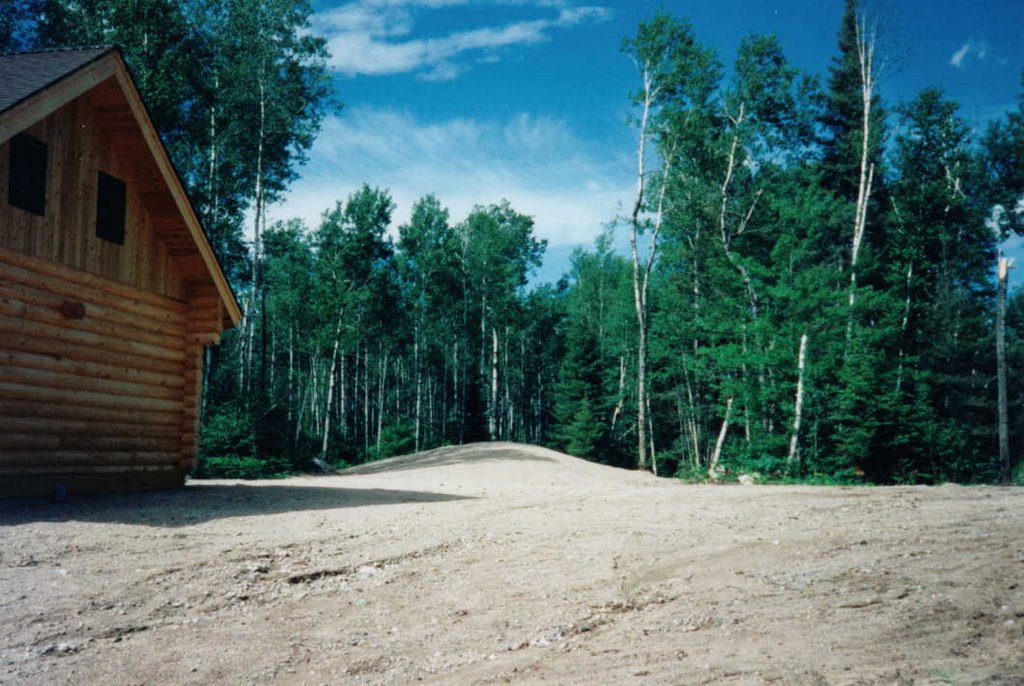
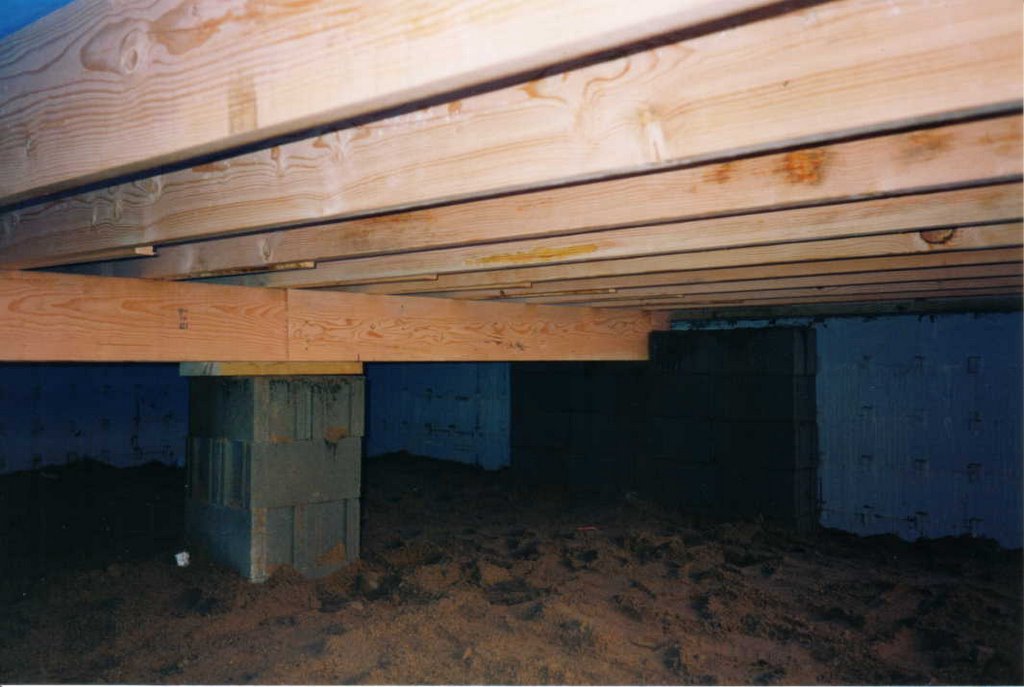
The main sewage line is a 6" diameter heavy duty plastic pipe that runs through the crawl space. It collects the dirty water from the kitchen, bathroom and vanity and dumps it into a 1000 gallon precast concrete septic tank. The tank is buried in the ground.

The septic tank consists of two chambers. The first compartment allows anaerobic bacteria to begin the process of decomposition and the second chamber diverts the sewage to a system of open drains through which the effluent leaches back into a large drain field.

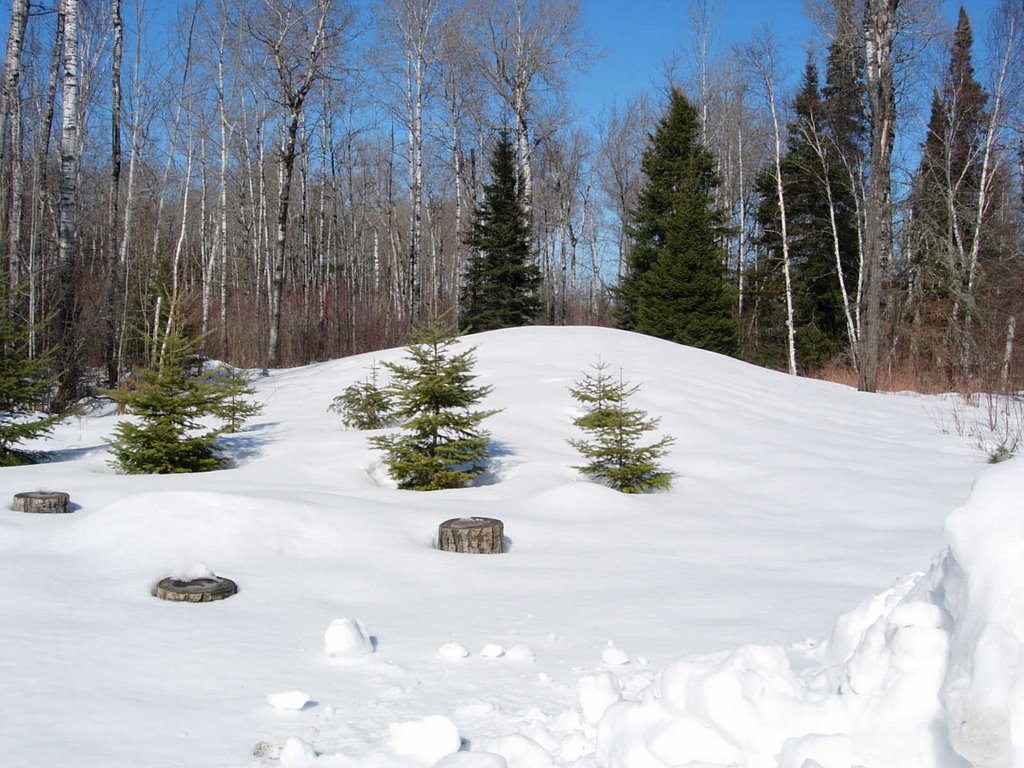
The drain systems is buried into the large mound of granular material There the effluent is further attacked by aerobic bacteria and the effluent is rendered harmless. Cess pools, and other disposal systems are not allowed by the county where the cabin is located.

The design and installation of the sewage disposal system is regulated by the county and only certified and licensed installers are allowed to construct the system. The soil is tested to determine whether the soil is suitable for leaching and the size of the drain tile field. If the soil is semi-impervious, a large mound of granular material must be built for the tile field. Our installation is of that design.

We humorously call our granular mound our "elephant burial ground". Balsam trees are planted on one side of the mound to hide it from view.

Sunday, February 05, 2006

Wild Rice - Flash Back

In the late 1940's, my father and I visited an old friend of my father's who had a place on the nearby river. Not far down stream from the friend's place was a widening of the river with a large bed of wild rice.

It was in the fall of the year, and the Native Americans were harvesting the wild rice by pushing their canoes into the wild rice beds. The harvest process began by bending heads of the plants over the gun wales of the canoe and then beating the wild rice grains loose from the plant . One stick was to bend the plant head over the edge of the canoe and the other stick was to beat the grains loose. The grain fell into the bottom of the canoe and collected. After many hours of work the wild rice grains were brought in for further processing.

Wild rice, not related to rice, is an aquatic grass that grows from 4 to 8 feet high. Wild rice grows naturally in shallow rivers and lakes in our area. The grains are long, spindly; grayish is color.

My father and I watched and admired the skill and hard work the Native Americans used in the harvesting of the wild rice. Wild rice is a special delicacy used with fish, duck, pheasant or or sausages. It is also used as a side dish with many meats . Wild rice is rich in vitamin B. .

Sunday, January 29, 2006

Winterizing Water Lines

Of course, we turn off the water, drain the pipes and put anti-freeze into the drain traps for the winter.

The water supply system is designed to drain as the water supply lines are sloped to a low point where turn on-off valves are placed. The sink and tub faucets are opened to allow air into the pipes to replace the water running out.

The electric power to the deep submergeable pump and the 40 gallon electric hot water heater are turned off. Both the pressure tank and hot water heater are drained into a precast circular catch basin. This empties the two tanks of water.

The tank and bowl of the toilet are drained. One cup of anti-freeze is placed into the tank and two cups of anti-freeze are placed into the toilet bowl - drain. One cup of anti-freeze is also poured into the bath tub drain, the vanity sink drain and the kitchen sink drain.

The RV Marine Anti-freeze (Isobar) is used as it protects the drains to minus 50 degrees, F. The anti-freeze mixes with the water in the traps of drains and keeps the water from freezing.

The design of our system allows quick and easy drainage and the turn on process is also simple to use. The shut off process takes approximately one-half to one hour.

Tuesday, January 24, 2006

Blog Mayhem

StatCounter (the hit counter on my website) has been down for two days. Because the counter that shows how many people have visited my Blog isn't showing up, its doing weird things to the format of the entire Blog on some browsers. Apparantly, there are quite a few websites & blogs affected by this.

My apologies to anyone that has tried to access my Blog and has ended up frustrated.....because I certainly am :-)

Sunday, January 22, 2006

The Source of Illumination

The electrical service comes in from the power company's main line running adjacent to the county road. The 200 foot power line was placed over head to a single power pole and then under ground to the crawl space of the log cabin.

The 200 amp service panel was placed within an interior partition of the bedroom. From the service panel the wiring was fed vertically from the crawl space into the interior partitions and thru pre-drilled vertical holes in the exterior logs to switches, outlets and the main ceiling.

The wiring of the interior lights was placed below the loft and are hidden by a grooved flat board nailed to the bottom of the wood deck of the loft floor.

GFCI outlets were placed in the vanity space and around the kitchen area.

These outlets are per the electrical code and were used where it is possible to over-load the capacity of the wiring. The outlet automatically shuts off the power. After the shut off the outlet can be manually reset to work again.

In the kitchen area the GFCI outlets were wired in line with only one outlet that had a manual reset. Several outlets down line from the manual reset outlet lost power. We tested the outlets; but no power. We thought the wiring had gone bad, until the up line reset outlet was pushed. Wow - the outlets worked again.

The electric stove, the submergeable water pump, the hot water heater and the base board heaters were wired with a 220 volt service.

An electric heater was installed in the crawl space near the pressure tank and the hot water heater to provide heat to the crawl space during the colder weather.

A trouble light and outlet was placed in the crawl space near the presure tank and hot water heater. The light came to our aid providing illumination when I replaced the burned out electric electrodes in the hot water heater.

An exterior waterproof outlet was placed on the porch for electrical accessories. It came in handy for an electric cord hook- up to a head bolt heater in our car during a cold weather spell.

Thursday, January 05, 2006

Interior and Exterior Finishes

The cabin was now ready for the finishes. Our first task was to lightly sand the burrs and rough spots on the logs. We used a palm sander for this task. There was one interior loft log that had many burrs and rough surfaces. A larger belt power sander was used on this log.

The sanding process went on for hours. Finally, the surfaces were smooth enough to apply a couple coats of polyurethane. The contractor applied the same finish to the pine board ceiling.

The loft rails were shaped differently than the main wall and loft logs. Each of the verticals and horizontals were hand crafted and shaped so each had to be hand sanded before the finish coat was applied.

The 2 ' 8" wide stairs were crafted with half logs as treads fastened into the sides of 2-1/2" by 11" deep wood strings. The stairs turn 90 degrees near the bottom of the stair run into a platform about 16 high. One rise of the longer stair run was purposely positioned at 1-1/2" higher than the normal 7-1/2" riser. The string was cut for this 1-1/2" to compensate for the wall log settlement that was anticipated. The stairs loft edge and railings form an interesting architectural composition and invite comments from visitors.

The urethane finish was applied before the kitchen floor and wall cabinets were erected. This pre-finishing behind the cabinets prevented the mold from harboring behind the cabinets.

Sometime after the sanding of the logs and before the entire finish was applied, the temperature rose to a very, very high degree for the area, and the humidity also rose to high levels. Mold appeared at the interior corners and other interior surfaces of the logs. Much effort was used to remove the mold. References were checked, and commerical products were applied to no avail. The contractor and log supplier were contacted. The solution to the mold problem had escaped everyone.

A water-Hilex bleach solution was applied to the logs along with scraping and sanding. Nothing seemed to work. More scraping and sanding. More water-Hilex bleach solution was used. The water Hilex solution appeared to work best but the results were not satisfactory.

Finally, the log supplier applied an anti-mold chemical to the logs with mold and placed caulking in and around the interior open joints where the logs cross at the corners. The caulking made the corners tight against the rain and weathering. The mold problem appeared to be solved and the interior finishing continued.

The interior partitions received two coats of finish. The loft floor, log stairs and log rails have three coats of finish to protect the wood decking from foot traffic.

A green tile was laid in the bathroom and under the wood burning stove in the great room. We chose a green, red, blue and orange plaid carpet for the main floor great room, kitchen and dining area. A deep red carpet was laid in the bedroom on the main floor.
The tile below the wood stove is a 6" by 6" tile the same as the bathroom. It is built up into a raised platform to elevate the stove about 4" above the main floor.In addition to the elevated platform, the tiles were laid at floor level making the tiled area 12 square feet meeting the requirements.

The exterior face of the logs and other siding was finished with HighSierra Log Stain by Sashco. The contractor sprayed the stain on the logs. The stain helps preserve and protect the logs from the sun and weathering.
Blog Widget by LinkWithin