Showing posts with label Cabin. Show all posts

Thursday, February 12, 2009

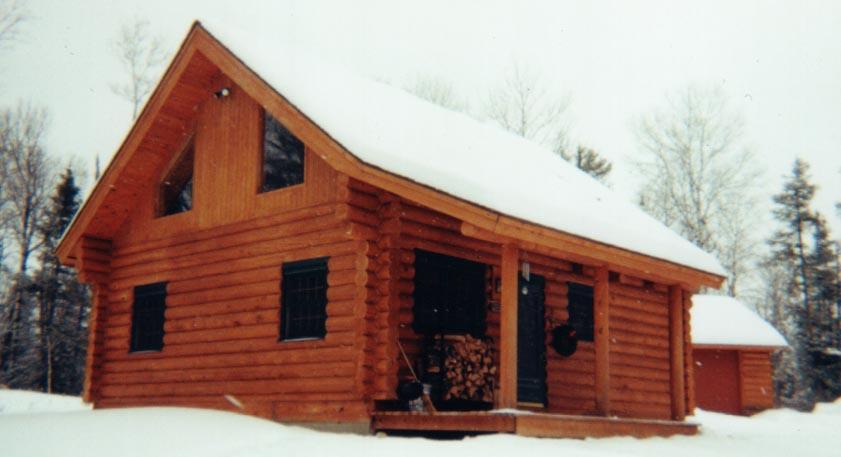
Closing Up The Cabin For Winter

I covered the basic steps in closing a cabin and winterizing the water lines in previous posts.

The following is a master checklist we use to close the cabin for the winter or long stretches during winter. 

The main item to consider is the removing water from the piping, traps, pressure tank, hot water tank, and toilets.  The removal of the water is necessary. As water freezes, it expands and when water is contained, the pipes, traps, tank and toilets may break or leak. Hiring a plumber to fix these items can be expensive.

Consider these steps:
1. Turn off the electrical power to any submurgeable pump and electrical hot water heater. (Natural or propane gas water heaters should be turned off).

2. Turn off the water valve entering into the cabin. This may be a curb stop valve that is in the waterline and below the frost line on the exterior of the cabin.

3. Open all faucets (kitchen, vanities, tub, toilet and any outside hose bibb). Drain the hose at the kitchen sink.

4. Open the valves for the hot water heater and pressure tank. (A Pressure tank is used when a submurgeable pump is used to bring water from an underground aquifer).

5. Open the cold water and hot water valves in the basement or crawl space and let the water run into the basement or crawl space drains. (This is based on the water lines that slope toward water line valves. If the water lines do not slope toward the waterline valves, the lines will be required to be blown with pressurized air to push the water toward the valves.

6. Close the water valve that services to the toilet tank. Flush the toilet to drain the toilet water tank. Sponge the toilet tank and stool dry. Pour one cup of RV anti-freeze into the kitchen, vanity, tub drains, and any other drains. Use 2 cups in the toilet drain as the trap is larger than the other traps. Also place anti-freeze in the toilet tank. The anti-freeze will keep the drain trap water from freezing solid.

7. Turn off all electric and gas heaters. Unplug the refrigerator, toaster, coffee maker, T.V., radios and any other electrical appliance. The main power to the cabin may be turned off or left on, as an optional choice.

8. Turn on any security systems. These may be connected to the main power source. If so, leave the main power on. The power company will charge you for the electrical power that is used, but it is usually a minimum charge and will be worth your expense.

Saturday, January 10, 2009

Plumbing, Ventilation, and Electrical Systems

One of the important features of a log home is the mechanical and electrical systems.

The crawl space below the main floor provides space for pipes, electrical, hot water heater and water storage tank. It is important to keep the depth of the crawl space at least 2'6" (between the bottom side of the floor to the floor of the crawl space). This space makes the workmen's job as easy as possible. More depth may be required for the hot water heater and water storage tank.

The water pipes carry fresh hot and cold water from the water storage tank to the sinks, bath tub, toilet fixtures and the outside faucet. Other pipes carry waste water to the septic tank and leaching field.

The electrical wires are usually placed in the bored vertical and horizontal holes in the exterior logs. The switch and outlet boxes are recessed into the logs. The electrican places these recessed boxes per the local electrical codes.

In the interior partitions, usually framed with wood studs and covered by gypsum board or tongue and groove wood panels, the electrical wires and piping can run between the main floor and the second or loft floor It is best to avoid pipes and duct in the exterior log walls. On the second or loft floor, the pipes, wires, and possible ducts are more difficult to hide. One possible solution is to build a double floor; that is, to build a shallow conventional floor system over the log shaped ceiling joists and wood deck. This provides space to run piping and wire to the main floor ceiling lights and any second floor sinks and toilets. Ducts may also use this space.

If sinks, toilets and ducts are not used on the second floor, the electrical wiring may use a single floor system, using wire chases top routed into the single wood board placed below the main tongue and groove second floor wood deck.

A double floor system on the second floor may also be used to reduce noise between the main and second floor rooms. Of course, this may add expense to the second floor system.

Of course, these mechanical and electrical systems are suggested guidelines. As log cabins vary greatly in design, they may require other solutions.

Monday, December 01, 2008

Log Cabin Fireplace

From the very beginning, log cabins in America, were built with fireplaces/chimneys. Most early chimneys were built of stone or brick.

Later, log cabins were constructed with metal stack chimneys to accommodate wood burning metal stoves.

Today, chimneys are built on inside or outside walls of the cabin and are stone. The stone fireplace/chimney is a major architectural feature of the cabin, giving the cabin a rustic look which appeals to our emotions.

Many fireplaces/chimneys are built of native small, medium and large flat faced rock, mortared together. These stone chimneys are large and are great works of art establishing a strong sense of substance and scale. The stones are natural color, usually from river rock.

Other stone chimneys are cut to form small or medium size rectangular pieces giving an ashlar style look to the fireplace/chimney.

The stone of the fireplace/chimney is extended to the facing on the foundation walls, piers, retaining walls and, at times, to porch/patio details and plant edging. The stone gives unity to the architectural look of the cabin and landscaping.

A local stone supplier has an interesting variety of stone that is manufactured from natural ingredients; that is, lightweight aggregate, portland cement and iron oxide pigments. The stone is a cast element into many rock shapes. The backside is flat and the front side looks and feels like stone.

Thickness ranges from one inch to three inches, depending on the style of stone to be used. The stone is applied similar to a veneer to a sheathing, concrete or concrete masonry unit back up. The sheathing must be covered with a moisture barrier to protect the sheathing from any possible moisture that may get into the wood sheathing. The concrete or concrete masonry units need no moisture barrier.

A mortar scratch coat is applied over metal lath when sheathing is used as a backup. The mortar scratch coat is applied directly to the concrete or concrete masonry units when they are used as a backup. The veneer stone is then applied directly to the mortar scratch coat using mortar joints between the individual stone pieces.

The types of stone facing are varied, from uncoursed fieldstone (rough or ordinary), coursed rubble, squared-stone masonry, random ashlar (interrupted coursing) or range ashlar (coursed). The look and feel of natural stone are best color- blended together during installation to achieve the desired results.

A beautiful stone fireplace establishes a strong sense of substance and scale for the cabin.

Friday, October 31, 2008

Building With Logs

Whether the log cabin or home is being built with cedar, larch, pine or oak logs, the structural strength of the proposed log specie may be in question. Of course, certain portions of a tree can be used as structural members in building a cabin. Good rules of thumb have been used in the past by experienced log home builders.

At present, a new building code is being used to provide answers to the question of structural strength. That new code is the International Building Code, 2006. (IBC). This code may or may not apply to certain counties or states as the IBC must be adopted by the local building authority.

The IBC requires inspection by a certain grading agency or a structural engineer of record to estimate the structural strength of the log and the suitability of logs for structural application. This is covered in the IBC, section 2303.1.10.

The grading agency establishes the criteria to guide the strength reducing log characteristics such as holes, splits, checks, and knots allowed for the proposed log specie. The grading agency determines the stress grades and, in turn, derives the strength values.
Of course, the grading strength values are important. Other issues are to be considered; such as connections of round or non-standard shapes because they are custom made and are used without experimental testing information.

The International Building Code (IBC) is not available to all log home builders, as the locale that the builder builds in may not have adopted the IBC.

The best approach to using logs in constructing a log cabin or home is to use the expertise of any experienced log home builder. An alternative would be to obtain the expertise of a licensed Structural Engineer.

Monday, October 27, 2008

Memories of a Great Woodsman

Once in a life time you meet a great woodsman and story teller. My father met one. They were contemporaries that probably met in their younger days. The times were in the late 1920's or early 1930's, hard times for many. My grandfather owned an old log cabin and a large acreage of wooded land.

My father (on the right in the photo) was one of the lucky employed and his friend (left) was unemployed. We call my dad's friend 'Buck'. 'Buck'was an excellent trapper at the time. My father asked 'Buck' if he would like to go up to the old cabin to continue trapping and to use it as long as he wanted. 'Buck' knew that trapping would be good, so he took up my father's proposal. The old log cabin was primative as it had no well water and only an outhouse. The heating was an old oil drum stove and needed a constant wood source. That kind of cabin living appealed to 'Buck', so he felt at home.

At that time, the timberwolf population was large and growing. The state had a bounty on the wolves so as to control the wolf population.

'Buck' took up trapping timberwolves and other fur bearing animals such as mink, beaver and ermine. Trapping was 'Buck's' main source of income. He trapped out of my grandfather's cabin for a number of years, probably up to World War II.

I met 'Buck' when my father and I visited the old log cabin 'Buck' and his friend now lived in a rented farm house not far from the old log cabin. The farm house had well water and better toilet facilities. My father and 'Buck' would sit for hours telling trapping, hunting, fishing and outdoor stories. I sat back and only listened, being only 10 years old. The stories were more interesting than anything I ever read.

My father and 'Buck' planned many fishing and hunting trips during these visits, and I was included on these trips. We had a 12' fishing boat and an outboard 2- 1/2 horsepower motor with the usual fishing gear.

One fishing trip I remember was a two week trip to a remote great fishing lake in Canada. Many walleyes were taken and again the stories told around the canp fire were wonderous. My father caught a 32 pound lake trout, the largest of the trip.

'Buck' was a true outdoors man. Others say he was one of the best trappers in the state of Minnesota. 'Buck' was also a great story teller as he experienced and lived these great stories of the outdoors. If he had written a book, it would be a great best seller.

Sunday, June 01, 2008

Anatomy of the Well

Usually ground water is found in the underground formations called aquifers. The soil and rock that lie between the ground surface and the aquifer act as a barrier against any possible contamination to the aquifer.

The well that was installed at our cabin is 225 feet deep. The well was drilled thru both soil and many feet of rock into an underground stream of water. After the drilling was complete, a submersible pump and motor were installed into the underground stream inside a casing that keeps debris from entering into the piping. Connected to the submersible pump and motor is a drop pipe that extends up to the pitless unit at ground level.

The submersible pump and motor are powered by electrical wire that runs down and parallel to the drop pipe from the pitless unit at ground level. The electrical wire is connected to an electrical control box and the water flow is controlled by an automatic pressure switch.

The water is pumped into the cabin from the drop pipe into a discharge pipe placed below the frost lines. The discharge pipe is connected to the pressure water storage tank and is controlled by an automatic electrical pressure switch. The water in the pressure tank supplies the cabin plumbing fixtures, such as the shower, toilet, sinks and hot water heater. (See sketch for the anatomy of a well).

This type of well is powered by electrical power supplied to the cabin. The water supply is contingent on a continuous flow of electrical power. At times the electrical power is down or interrupted for short periods of time; therefore the water supply is off.

It is still possible to obtain water from this type of well. A PVC pipe shaped well bucket (4 1/2" diameter for 6" pipe) can be sent down the drop pipe into the aquifer or underground stream and pulled up to the surface with a rope attached to the bucket. In the case of our 225 foot deep well, this method is impractical. Therefore, some bottled water for drinking is a must. Of course, the electric power is usually down for only short periods of time and is not a major inconvenience.

Monday, March 24, 2008

Animal Tracks

The story of an animal traveling through a forest is left by it's tracks. At times the tracks are difficult to see. Tracks consist of bent grass, a dragged leg, or a foot print of the animal.

There are three types of tracks; the nail walkers such as deer or horse; the flat walkers like a squirrel or bear; and toe walkers like a cat or dog.

In our forest, where white tail deer are abundant, the prints of the deer depend upon: the material it is walking on; the movement of the deer; whether walking or running; and the size of the deer. It also depends on the season of the year.

The prints vary in size depending on fore or hind legs. For example: fore: 3"x 2" - hind: 2-3/4"x 1-1/2".

White tail deer track looks like this:

Saturday, January 26, 2008

A Surprising Challenge

Many times surprises occur when one goes into the woods. The surprise is often the sight of a beautiful deer or a red fox.

Recently, we arrived at the front gate of the driveway to the cabin and, to our surprise, a 12 inch in diameter balsom had been blown down and blocked the driveway.

It was 4:30 p.m. and it would be dark by 5:30 p.m. As we were surveying the situation, trying to decide how we were going to remove the tree, we heard this friendly voice. It was our neighbor who lives up the road. He had been hunting and had seen the fallen tree earlier in the day.

"Do you have a chainsaw?" he asked. "Yes, let's go get the saw from the garage." After putting gas and chainsaw oil into the chainsaw, we proceeded to remove the tree. My neighbor is a nice young man who loves the woods. He was very willing to help out.

He first worked on cutting off the branches. I grabbed the cut off branches and placed them into the woods away from the driveway. Soon, he started cutting the trunk into 16" to 18" pieces. These pieces were tossed into the woods and soon the tree was completely removed. All this was completed in about 30 minutes.

It's nice to have good neighbors who help with such surprises!

Wednesday, January 16, 2008

Burn Piles

It has been approximately a year since the logging operation in our forest. The logs were hauled away and new growth has begun.

A large pile of branches that were trimmed from the logs and some dead trees remained. It is dangerous to set the pile on fire during the summer months; but, the winter with 15 inch deep snow is ideal. A still day, without any wind, is just perfect to light the 15' high pile on fire. Our logger cleaned off some snow, poured some fire-starting liquid on the pile and lit a fire.
The fire was large and the ashes and remaining pieces of branches and trees were reduced to a pile approximately four feet high. After five days, the pile was still smoldering, but more snow fell, putting the fire out by covering the ashes.

Spring will arrive in a few months, the new growth will continue and the forest will renew itself. What a marvelous transformation!!

Monday, January 07, 2008

Gobal Positioning Systems (GPS)

A GPS is a positioning device that is a mini computer for road and water travel that can be used in the wilderness. It eliminates the need of using a map and a compass.

The GPS device will give your location per latitude and longitude with fair accuracy. The device uses signals from a number of orbiting satellites, usually a minimum of three satellites is required.

Our GPS device is an older version, hand- held, battery powered, Garmin, Model GPS12. It gives the satelitte status, our position in latitude and longitude, a compass navigation and map to our point of destination. We use our GPS for mapping and locating the boundary of our property.

Before leaving on your trip, plug into the GPS memory the location of your cabin, car or motel. Then proceed to travel, hike or boat ride. When you want to return to your point of origin, enter the cabin, car or motel from the GPS memory and the GPS will guide you back to that beginning location.

Of course, it is a good idea to have a good map and a compass with to see the overall picture of the trip.

Tuesday, December 04, 2007

Floor Plan Possibilities

In my opinion, the most interesting floor plan for a proposed story and a half log cabin is an "L" shaped plan. The majority of the space is the "great room" and is the short leg of the "L". I've included sketches for one way the "L" shape plan may be arranged.

In this design, the first floor plan has two bedrooms, each approximately 11 feet by 15 feet which includes a closet. The bath is adjacent to the bedrooms and is near the kitchen and the "great room".

The kitchen is long and narrow with a long counter with base and wall cabinets. Eating space is on one end. There is room for a dishwasher and small combination washer/dryer, if desired.

The "great room" could be used for a larger dining area, if required, in addition to the living room. The "great room" is approximately 23 feet by 22 feet, large enough for any arrangement of furniture.

The second floor plan is composed of one large bedroom approximately 15 feet by 16 feet including closets. The bath is adjacent to the bedroom. The second floor room is under a sloping roof. The floor area may seem a bit large, but the useable area is restricted by the sloping ceiling.

A stairway fits into a corner opposite of the bath. The stair runs between the first and second floors.

The "gem" of this floor plan is the "great room" with its massive fireplace and hearth in addition to it's vaulted ceiling space and the three sided bank of windows. It is nice if the "great room" faces the view of a lake, river or mountain scene.

A patio could be placed outside the "great room" to enhance the indoor-outdoor relationship. A crawl space is below the first floor to house the necessary mechanical and electrical services, such as a furnace, hot water heater, and pressure tank for the well water.

This log cabin design has 2064 square feet of floor area. Of course, other plan configurations are possible.

Tuesday, October 23, 2007

Wood Truss

Of all the wood trusses that are constructed for use in a cabin, as an engineer my favorite is the wood truss that is shown in the sketch.

As noted in the sketch, the span of the truss is 24'-0". Of course, this truss would work between 20'-0" to 28'-0" of span. The spacing of the truss is 12'-0" on center.

With the roof slope of 12 on 12 and the heights involved, a cabin using this truss could lend itself to a story and one-half with the first story composed of the living room, kitchen, bathroom and lower main bedroom or bedrooms. The upper half story could house at least two bedrooms with a bathroom.

The truss shown has two large 10" x 14" horizontal timbers that carry the roof loads. The lower timber is placed at 7'-0" above the finished floor. This would match the height of the exterior doors and windows. The space between the lower timber and upper horizontal timber could house a strip of 2'-6" windows giving significant day light to a living room space. That 2'-6" space between the horizontal timbers could also be filled with a decorative wall surface.

The lower horizontal timber can be a member that raps around the entire structure adding a decorative feature to the exterior. Of course, the upper timber also raps around the entire structure and carries the roof rafters.

In order to provide day light to the upper one-half story, dormers with windows could be used and windows could be placed on the gable ends.

Both the interior and exterior can have more architectural interest by the use of this arrangement of the horizontal members matching the horizontal members of the truss. Other wood exterior surfaces and logs can be worked together to create horizontal, diagonal and vertical shadow lines on the exterior walls.

A massive stone fireplace could fit into an exterior or interior wall of the living room space.

Thursday, August 16, 2007

Communication and Construction

The work to select a good builder for the log cabin is complete and the builder has been selected. A written contract has been signed. Now what should be done to keep the owner in control of the building process? I learned, of course, communication is the key.

The contract should include the contractor's time schedule to complete the log cabin. Of course, the contract should include a list of exceptions which may delay the contractor's schedule and over which the contractor has no control, such as acts of God or delays by suppliers or sub-contractors.

The owner should keep an on-going written diary of the progress of the construction of the cabin. All communications with the contractor should be recorded. Using e-mail may be one method of communication, but use a hard copy of the major decisions to the contractor.

Inspections of the construction process by the owner is extremely important. Ask for a schedule from the contractor about the various components of the construction, such as the foundation work, the first floor framing, the log assembly, and the roof construction. You get what you inspect. Ask a lot of questions!

During the contruction process think and decide about the various fixtures in the cabin. What would you like for the kitchen cabinets, vanity cabinet, toilets, bathtubs, showers, stove, lighting, etc.? Balance your desires with your budget.

Wednesday, July 18, 2007

The Builder

The most important decision you make in building your new log home or cabin is choosing a good general contractor (builder) who is knowledgeable of building log homes or cabins.

Of course, the builder should have good references from past and current customers. The potential customer should inspect a number of homes or cabins that the builder has recently built. A careful inspection should include:

1. Log work tightness

2. Trim work alignment and tightness

3. Cracks in foundation walls, interior partitions, and interior finishes

4. Rain water infiltration

5. Levelness of floors and ridge lines

6. Check detailing of doors, windows, stairs and interior cabinet work

A good builder makes a project go smoothly as he or she knows the sub-contractors, and how to order materials and their delivery. The builder also knows permits required, driveway construction, sewers, water, electric power, the various costs, and the quality of the various materials. The builder can be a great help with the various details and decisions an owner must make on the project.

Communication is key. The owner must explain to the builder exactly what they want and at what cost. Therefore, an early estimate of the cost is very important.

Next, pre-qualify yourself for the total amount of the money you can afford to borrow. An old rule of thumb may be that 28% of your gross income should go for all long-term debt. Don't forget the down payment required. Also, shop for the lending institution like you shopped for the builder.

I like to obtain a set of drawings of the proposed house or cabin with specifications. One can then obtain bids from the good builders you have selected. It gives you more control of the bidding process.

Wednesday, May 30, 2007

Timber Roof Trusses

Many log homes and cabins have trusses that support the roof structure. The trusses accent the open ceiling and give the log home a sense of "structure".

The choice of truss configuration is based on the skill of the workmanship, cost, joinery and, most of all, aesthetics.

Trusses are expensive as they are time consuming to build and are labor intensive. The joinery is the major consideration as the truss members are pieced together by a variety of methods. Usually the trusses are pre-built; that is, they are assembled off site or on the ground at the site and lifted into place by a mobile crane.

The trusses should be engineered. Calculations based on the prevailing snow and wind loads of the area should be determined along with truss member sizes and the timber specie. I like to use rectangular sections of timbers, such as 4"x6", 6"x6", 6"x8", or 6"x10". The timbers are connected together with 3/4" round Thru-bolts with 1/4" steel plates on each side of the timber members where connected to each other. Each connection should be calculated to determine the proper number of 3/4" Thru=bolts on each side of the joint.

Trusses are best used in large rooms. A room 24' x 24' would be an ideal space for one large truss that is spaced at approximately 12' on center. The span of the truss is 24'. Small roof purlins with a 4' spacing then can frame from the end walls to the truss. Of course, other truss spacing may be used, but aesthetics dictate a large spacing for the trusses with purlins at the underside of the roof slope providing a nice arrangement of the structural pieces.

There are many different truss configurations. Just to name a few; Queen, Fink, Howe and Pratt. If the truss span is in the 18' to 25' range, the most economical truss is probably the Fink truss as it has the minimum number of truss pieces; thus reducing the number of connections of member to member.

The Fink truss has a straight bottom chord and sloping top chords that follow the slope of the roof. The web members; that is, the members that tie the top and bottom chords together form a "W" shape with the center of the "W" connecting at the ridge.

Other truss configurations are also used to create a more aesthetic arrangement of the structural pieces. Check with the builder or the log supplier as they may have a favorite truss to build.

Friday, May 25, 2007

More Wildlife Art

In a previous post on wildlife art, I gave kudos to the great wildlife artist, Philip Goodwin. I believe he ranked with the great artists such as N.C. Wyeth, Charles Russell and other contempories of the past.

Several years ago, I worked with a fine architect named Scot Storm. From the very beginning I saw in Scot his artistic eye. He was very conscious of doing a good job for our clients. After I got to know him better, he showed me some of his wildlife art. Wow! Not only is he a great architect, he is a great wildlife artist. His art work of ducks is unbelievable!

I retired from engineering work, and shortly after, a colleague mentioned that Scot had gone on his own to do wildlife art full time and his work is now for sale. I knew he would succeed. He has received many awards & recognition including first place in the contest for the 2004-05 Federal Duck Stamp.

For a great visual treat, please take a look at his website: www.Stormwildlifeart.com

Thursday, May 10, 2007

Wildlife Art

Some years ago, when I was a teenager, our family would visit the 'old' cabin on the present property. My father had wildlife art around the cabin walls. He always had the calendars with "predicament" wildlife art. I just loved those old calendars.

The "predicament" wildlife art was usually a copy of an original art depicting a hunter or fisherman with an encounter with a bear, moose or other dangerous animal. A female bear with two cubs running from a fisherman's cabin with a large chunk of bacon and sausages with the fishermen near by watching in surprise is an example of this "predicament" art.

About twelve years ago, I saw a similar 'old calendar' that had "predicament" wildlife art the same as I remember from my teenage years. The calendar was in an antique store. The price on the one section of the calendar framed was $200.00. I had to find out who the artist was who painted this "predicament" wildlife art. The artist's name was Philip R. Goodwin.

A quick look at the artist's biography indicated that he lived from 1881 to 1935. Philip was educated at the Rhode Island School of Design, Drexel Institute, and Howard Pye's School. He loved the outdoors and earned a living as a commercial artist. His most famous commercial trade mark is the horse and rider on the Winchester Fire Arms Posters and Advertisements. Philip was a contemporary of and knew N. C. Wyeth, Charles Russell and Carl Rungius, all great artists.

My search continued to find those great old calendars or posters painted by Philip Goodwin. It wan't long, when my daughter surprised me with a framed Philip Goodwin print for a Christmas Present. The print shows two hunters near their log cabin. One hunter is coming out of the cabin entry with a fry pan and the other hunter is reaching for his rifle as a mother bear and her cub are looking their way. I really enjoy that piece of art and all the art by Philip Goodwin.

One Goodwin print isn't quite enough! My search for a second Goodwin print soon ended in a gift store that catered to outdoor and wildlife art. The print shows two campers jumping into a birch bark canoe ready to chase a swimming bull moose. I bought it!

Both Goodwin prints are masterful in composition, subject and vivid colors. They are great examples of "predicament" art and are to be placed on the interior walls of any cabin or house.

Monday, April 30, 2007

Traditional Chinking

Years ago log cabin construction was made with handcrafted logs. The logs were straight and of durable first growth timber. The bark was skinned from the trees while green and was set aside for drying (seasoning). Some logs were pressure treated to resist weathering, insects and termites.

In constructing the old traditional cabin walls, the largest logs were placed at the bottom of the walls, tapering to the smallest logs at the top of the wall. The logs were reversed by placing the log top end of one log directly above the butt end of another log. This method insured a more uniform space between logs. This space between the logs was about two inches, with a minimum space of one inch.

After the logs were placed, chinking of the space between the logs proceeded. Six inch strips of expanded metal lath or heavy, small spaced wire fabric was placed on a diagonal between the logs. The metal strips were securely nailed to the bottom inside face of the top log and nailed to the top outside face of the bottom log. These metal strips were then covered by the mortar that ran continuously between the pgs for the length of each log.

The mortar my family used on our old cabin was a portland cement mortar mix; one bag of portland cement, 20% of lime by volume, and 3 cubic feet of loose plaster sand. These materials were mixed together dry. Water was added to produce a stiff mix. This mortar was allowed to stand for about one hour under a cover of wet cloth, then remixed. No additional water was added to the mortar.

The mortar was then ready to be placed for chinking. The mortar was simultaneously placed into the log spaces from both sides of the wall with compacting tools, pushing the mortar through the openings in the metal lath or wire fabric thus forming an anchor for the mortar.

The compacting tools were wood blocking about ten inches long with convex shaped face to produce a curved concave face to the chinking.

Feather edges against the logs were cut off with a trowel leaving approximately 1/4 inch shoulder on the top and bottom of the joint on both sides of the wall. Two to three hours later, the chinking and logs were painted with water glass (a sodium silicate solution). The water glass film began to peel and flake after several days and was removed with a dry rough scrub brush. The surfaces were then finished with sandpaper and finally stained. This sealed the walls from snow, wind, rain and animals.

In modern chinking (if used), the space between the logs is somewhat reduced. The space is filled with strip foam near the center of the logs and backer rods tight against the foam on each side. Then a synthetic chink is placed tight against the backer rods covering them, the foam and sealing against the logs. This new chink looks and feels like mortar. It is a permanent seal because of the elastic properties of the synthetic chink.

Thursday, March 22, 2007

Selective Logging

When the logger arrived at our place he said "You should have logged the property some ten years ago"

The logger was right as many of the large balsam, aspen, birch and pine trees have fallen because of high winds, decay and "old age."

I hired a local logger last summer who had a great reputation for selective logging of properties; taking only the most mature trees that needed to be harvested and leaving the healthy, younger trees so they will continue to grow.

The logger had all the equipment to cut, trim and lift the large trees into his large logging trucks. The local processing plants were not accepting any trees for a while, so the harvesting was delayed. The local processing plants use the trees to make home building products, such as wood sheathing. The trees can be also used at the paper mills to create paper for newspapers, magazines, etc.

When cutting down the trees, the logger cuts a wedge-shaped piece out of the trunk of the tree with his chain saw. Then the logger makes a chain saw cut on the opposite side of the wedge-shaped cut. The tree loses its strength and balance and falls toward the wedge-shaped side of the trunk.

The logger was able to fell the trees exactly where he wanted them. The falling tree avoids striking other trees or hitting stumps, large rocks, or equipment which might damage the falling tree's trunk. He trims the limbs and may cut the tree into shorter pieces. Some pieces may be 30 to 40 feet long.

Our logger created a landing (a central place to collect the fallen trees) and skidded (dragged) the fallen trees to the landing. He then placed the logs on the truck trailer and when the trailer was loaded with the logs, he transported the logs from the forest area to the processing plant some distance away. He also assembled the cut limbs into brush piles and when sufficient snow was on the ground, burned the brush piles.

The processing plant delay was lifted and the logger proceeded to log the property. Logs must be freshly cut when they arrive at the processing plant. Because of the delay at the processing plant, the logging took more time than expected.

The logger did a great job in selectively logging the forest. Now only healthy trees remain, the paths are open and we can see through the trees and underbrush. The forest will now rejuvenate and young, healthy growth will soon cover the land.

I am excited to see what species will spring up, and also I am looking forward to obtaining some small seedling pine trees and plant them this coming spring.

Thursday, March 01, 2007

The Great Room

When planning the spaces in our log cabin we wanted a spacious, open, bright larger room. We called it a Greatroom.

We focused on entertainment and family living. The Greatroom is a combination of living room, dining room and kitchen with a near smooth vaulted ceiling. The high vaulted ceiling gives the room a nice feeling of space.

The double hung windows are spaced around the Greatroom and provide an open feeling to capture the outdoors and much needed sunshine. During the evening hours, the vaulted ceiling is illuminated with flourescent strip lighting to cast light up into the vaulted area. Lighting is a key to the success of our great room. There is a five bulb hanging light over the dining table to add some light for evening dining and a table lamp is placed on top of the desk for reading.

The wall finishes of our Greatroom are all wood; logs or wood wall boards with a clear urethane finish. The kitchen cabinets are pine wood and the counter to is red laminate material.

The floor is wall to wall commercial carpeting with a diamond check pattern of green, red, orange, and blue. It is placed on the 3/4" plywood floor sheathing. The carpet adds color to the room.

The black wood stove is positioned on top of a 4" raised platform of green 12" quarry tile. The platform is made of unglazed ceramic tile placed on 1/2" thick cement board with floor tile adhesive. The cement board is supoorted by 2" x 4" wood framing at 16" on center. The size of the platform and the use of non-combustible materials conform to the building codes. This platform provides a base for the major winter focal point: the wood stove with its glass window.

The furniture blends with the rustic interior wall finishes. The dining table and chairs are log furniture made by a Canadian company . Our desk, beds and several other chairs are also made from logs. The couch is dark red leather and one chair is of green textured upholstered fabric. The colors blend well and accent the natural beauty of the logs and other wood construction.

The log stairs with hand- shaped log railings also add a nice rustic look to the furniture and other log construction.

In addition, several wild-life pictures are placed around the Greatroom to add visual interest. We have also enlarged and framed pictures we have taken of the forest. We have winter, spring, summer and fall pictures of one of our favorite areas. Each season displays a different beauty.

The Greatroom is open, spacious and inviting and it is very home-like to us.
Blog Widget by LinkWithin