The cabin was now ready for the finishes. Our first task was to lightly sand the burrs and rough spots on the logs. We used a palm sander for this task. There was one interior loft log that had many burrs and rough surfaces. A larger belt power sander was used on this log.

The sanding process went on for hours. Finally, the surfaces were smooth enough to apply a couple coats of polyurethane. The contractor applied the same finish to the pine board ceiling.
The loft rails were shaped differently than the main wall and loft logs. Each of the verticals and horizontals were hand crafted and shaped so each had to be hand sanded before the finish coat was applied.
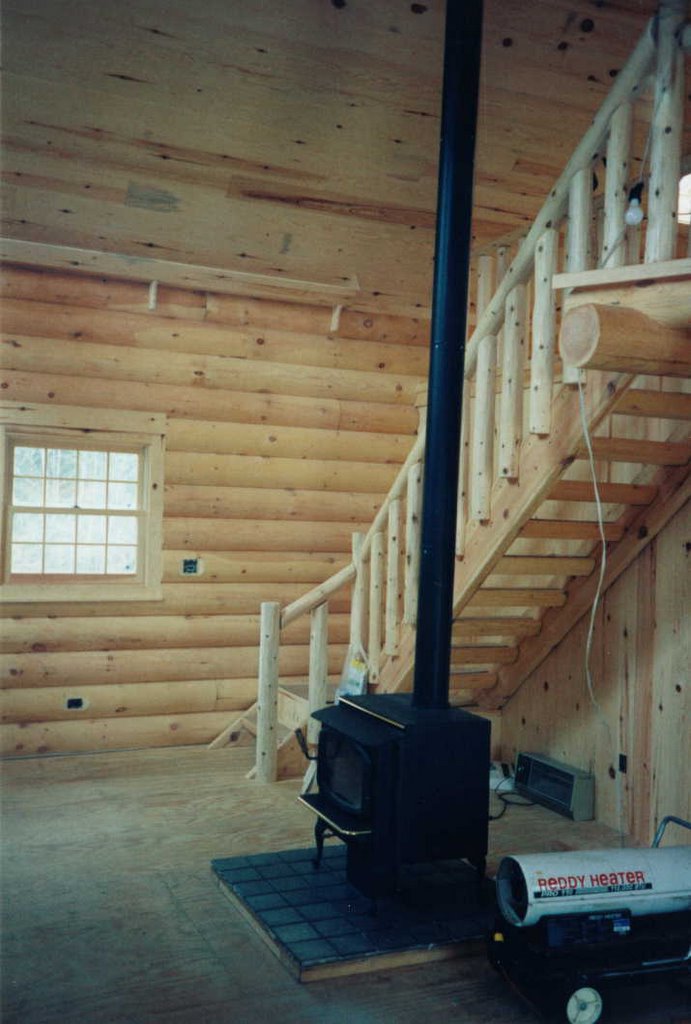
The 2 ' 8" wide stairs were crafted with half logs as treads fastened into the sides of 2-1/2" by 11" deep wood strings. The stairs turn 90 degrees near the bottom of the stair run into a platform about 16 high. One rise of the longer stair run was purposely positioned at 1-1/2" higher than the normal 7-1/2" riser. The string was cut for this 1-1/2" to compensate for the wall log settlement that was anticipated. The stairs loft edge and railings form an interesting architectural composition and invite comments from visitors.
The urethane finish was applied before the kitchen floor and wall cabinets were erected. This pre-finishing behind the cabinets prevented the mold from harboring behind the cabinets.

Sometime after the sanding of the logs and before the entire finish was applied, the temperature rose to a very, very high degree for the area, and the humidity also rose to high levels. Mold appeared at the interior corners and other interior surfaces of the logs. Much effort was used to remove the mold. References were checked, and commerical products were applied to no avail. The contractor and log supplier were contacted. The solution to the mold problem had escaped everyone.
A water-Hilex bleach solution was applied to the logs along with scraping and sanding. Nothing seemed to work. More scraping and sanding. More water-Hilex bleach solution was used. The water Hilex solution appeared to work best but the results were not satisfactory.
Finally, the log supplier applied an anti-mold chemical to the logs with mold and placed caulking in and around the interior open joints where the logs cross at the corners. The caulking made the corners tight against the rain and weathering. The mold problem appeared to be solved and the interior finishing continued.
The interior partitions received two coats of finish. The loft floor, log stairs and log rails have three coats of finish to protect the wood decking from foot traffic.

A green tile was laid in the bathroom and under the wood burning stove in the great room. We chose a green, red, blue and orange plaid carpet for the main floor great room, kitchen and dining area. A deep red carpet was laid in the bedroom on the main floor.
The tile below the wood stove is a 6" by 6" tile the same as the bathroom. It is built up into a raised platform to elevate the stove about 4" above the main floor.In addition to the elevated platform, the tiles were laid at floor level making the tiled area 12 square feet meeting the requirements.
The exterior face of the logs and other siding was finished with
HighSierra Log Stain by Sashco. The contractor sprayed the stain on the logs. The stain helps preserve and protect the logs from the sun and weathering.
 Of course, we turn off the water, drain the pipes and put anti-freeze into the drain traps for the winter.
 The tank and bowl of the toilet are drained. One cup of anti-freeze is placed into the tank and two cups of anti-freeze are placed into the toilet bowl - drain. One cup of anti-freeze is also poured into the bath tub drain, the vanity sink drain and the kitchen sink drain.
 The design of our system allows quick and easy drainage and the turn on process is also simple to use. The shut off process takes approximately one-half to one hour.