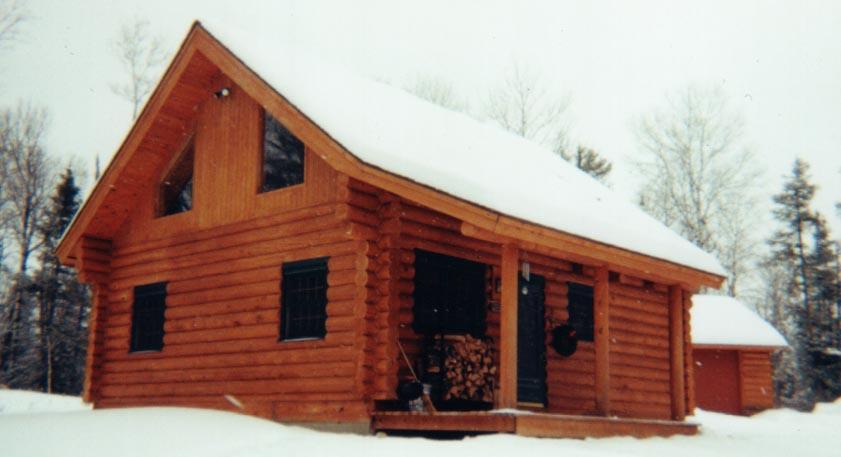
The most important decision you make in building your new log home or cabin is choosing a good general contractor (builder) who is knowledgeable of building log homes or cabins.
Of course, the builder should have good references from past and current customers. The potential customer should inspect a number of homes or cabins that the builder has recently built. A careful inspection should include:
1. Log work tightness
2. Trim work alignment and tightness
3. Cracks in foundation walls, interior partitions, and interior finishes
4. Rain water infiltration
5. Levelness of floors and ridge lines
6. Check detailing of doors, windows, stairs and interior cabinet work
A good builder makes a project go smoothly as he or she knows the sub-contractors, and how to order materials and their delivery. The builder also knows permits required, driveway construction, sewers, water, electric power, the various costs, and the quality of the various materials. The builder can be a great help with the various details and decisions an owner must make on the project.
Communication is key. The owner must explain to the builder exactly what they want and at what cost. Therefore, an early estimate of the cost is very important.
Next, pre-qualify yourself for the total amount of the money you can afford to borrow. An old rule of thumb may be that 28% of your gross income should go for all long-term debt. Don't forget the down payment required. Also, shop for the lending institution like you shopped for the builder.
I like to obtain a set of drawings of the proposed house or cabin with specifications. One can then obtain bids from the good builders you have selected. It gives you more control of the bidding process.
Wednesday, July 18, 2007

Wednesday, May 30, 2007
Timber Roof Trusses
 Many log homes and cabins have trusses that support the roof structure. The trusses accent the open ceiling and give the log home a sense of "structure".
The choice of truss configuration is based on the skill of the workmanship, cost, joinery and, most of all, aesthetics.
Trusses are expensive as they are time consuming to build and are labor intensive. The joinery is the major consideration as the truss members are pieced together by a variety of methods. Usually the trusses are pre-built; that is, they are assembled off site or on the ground at the site and lifted into place by a mobile crane.
The trusses should be engineered. Calculations based on the prevailing snow and wind loads of the area should be determined along with truss member sizes and the timber specie. I like to use rectangular sections of timbers, such as 4"x6", 6"x6", 6"x8", or 6"x10". The timbers are connected together with 3/4" round Thru-bolts with 1/4" steel plates on each side of the timber members where connected to each other. Each connection should be calculated to determine the proper number of 3/4" Thru=bolts on each side of the joint.
Trusses are best used in large rooms. A room 24' x 24' would be an ideal space for one large truss that is spaced at approximately 12' on center. The span of the truss is 24'. Small roof purlins with a 4' spacing then can frame from the end walls to the truss. Of course, other truss spacing may be used, but aesthetics dictate a large spacing for the trusses with purlins at the underside of the roof slope providing a nice arrangement of the structural pieces.
There are many different truss configurations. Just to name a few; Queen, Fink, Howe and Pratt. If the truss span is in the 18' to 25' range, the most economical truss is probably the Fink truss as it has the minimum number of truss pieces; thus reducing the number of connections of member to member.
 The Fink truss has a straight bottom chord and sloping top chords that follow the slope of the roof. The web members; that is, the members that tie the top and bottom chords together form a "W" shape with the center of the "W" connecting at the ridge.
 Other truss configurations are also used to create a more aesthetic arrangement of the structural pieces. Check with the builder or the log supplier as they may have a favorite truss to build.
Friday, May 25, 2007
More Wildlife Art
In a previous post on wildlife art, I gave kudos to the great wildlife artist, Philip Goodwin. I believe he ranked with the great artists such as N.C. Wyeth, Charles Russell and other contempories of the past.
Several years ago, I worked with a fine architect named Scot Storm. From the very beginning I saw in Scot his artistic eye. He was very conscious of doing a good job for our clients. After I got to know him better, he showed me some of his wildlife art. Wow! Not only is he a great architect, he is a great wildlife artist. His art work of ducks is unbelievable!
 I retired from engineering work, and shortly after, a colleague mentioned that Scot had gone on his own to do wildlife art full time and his work is now for sale. I knew he would succeed. He has received many awards & recognition including first place in the contest for the 2004-05 Federal Duck Stamp.
For a great visual treat, please take a look at his website: www.Stormwildlifeart.com
Several years ago, I worked with a fine architect named Scot Storm. From the very beginning I saw in Scot his artistic eye. He was very conscious of doing a good job for our clients. After I got to know him better, he showed me some of his wildlife art. Wow! Not only is he a great architect, he is a great wildlife artist. His art work of ducks is unbelievable!
 I retired from engineering work, and shortly after, a colleague mentioned that Scot had gone on his own to do wildlife art full time and his work is now for sale. I knew he would succeed. He has received many awards & recognition including first place in the contest for the 2004-05 Federal Duck Stamp.
For a great visual treat, please take a look at his website: www.Stormwildlifeart.com
Thursday, May 10, 2007
Wildlife Art
Some years ago, when I was a teenager, our family would visit the 'old' cabin on the present property. My father had wildlife art around the cabin walls. He always had the calendars with "predicament" wildlife art. I just loved those old calendars.
 The "predicament" wildlife art was usually a copy of an original art depicting a hunter or fisherman with an encounter with a bear, moose or other dangerous animal. A female bear with two cubs running from a fisherman's cabin with a large chunk of bacon and sausages with the fishermen near by watching in surprise is an example of this "predicament" art.
 About twelve years ago, I saw a similar 'old calendar' that had "predicament" wildlife art the same as I remember from my teenage years. The calendar was in an antique store. The price on the one section of the calendar framed was $200.00. I had to find out who the artist was who painted this "predicament" wildlife art. The artist's name was Philip R. Goodwin.
A quick look at the artist's biography indicated that he lived from 1881 to 1935. Philip was educated at the Rhode Island School of Design, Drexel Institute, and Howard Pye's School. He loved the outdoors and earned a living as a commercial artist. His most famous commercial trade mark is the horse and rider on the Winchester Fire Arms Posters and Advertisements. Philip was a contemporary of and knew N. C. Wyeth, Charles Russell and Carl Rungius, all great artists.
 My search continued to find those great old calendars or posters painted by Philip Goodwin. It wan't long, when my daughter surprised me with a framed Philip Goodwin print for a Christmas Present. The print shows two hunters near their log cabin. One hunter is coming out of the cabin entry with a fry pan and the other hunter is reaching for his rifle as a mother bear and her cub are looking their way. I really enjoy that piece of art and all the art by Philip Goodwin.
One Goodwin print isn't quite enough! My search for a second Goodwin print soon ended in a gift store that catered to outdoor and wildlife art. The print shows two campers jumping into a birch bark canoe ready to chase a swimming bull moose. I bought it!
Both Goodwin prints are masterful in composition, subject and vivid colors. They are great examples of "predicament" art and are to be placed on the interior walls of any cabin or house.
 The "predicament" wildlife art was usually a copy of an original art depicting a hunter or fisherman with an encounter with a bear, moose or other dangerous animal. A female bear with two cubs running from a fisherman's cabin with a large chunk of bacon and sausages with the fishermen near by watching in surprise is an example of this "predicament" art.
 About twelve years ago, I saw a similar 'old calendar' that had "predicament" wildlife art the same as I remember from my teenage years. The calendar was in an antique store. The price on the one section of the calendar framed was $200.00. I had to find out who the artist was who painted this "predicament" wildlife art. The artist's name was Philip R. Goodwin.
A quick look at the artist's biography indicated that he lived from 1881 to 1935. Philip was educated at the Rhode Island School of Design, Drexel Institute, and Howard Pye's School. He loved the outdoors and earned a living as a commercial artist. His most famous commercial trade mark is the horse and rider on the Winchester Fire Arms Posters and Advertisements. Philip was a contemporary of and knew N. C. Wyeth, Charles Russell and Carl Rungius, all great artists.
 My search continued to find those great old calendars or posters painted by Philip Goodwin. It wan't long, when my daughter surprised me with a framed Philip Goodwin print for a Christmas Present. The print shows two hunters near their log cabin. One hunter is coming out of the cabin entry with a fry pan and the other hunter is reaching for his rifle as a mother bear and her cub are looking their way. I really enjoy that piece of art and all the art by Philip Goodwin.
One Goodwin print isn't quite enough! My search for a second Goodwin print soon ended in a gift store that catered to outdoor and wildlife art. The print shows two campers jumping into a birch bark canoe ready to chase a swimming bull moose. I bought it!
Both Goodwin prints are masterful in composition, subject and vivid colors. They are great examples of "predicament" art and are to be placed on the interior walls of any cabin or house.
Monday, April 30, 2007
Traditional Chinking
Years ago log cabin construction was made with handcrafted logs. The logs were straight and of durable first growth timber. The bark was skinned from the trees while green and was set aside for drying (seasoning). Some logs were pressure treated to resist weathering, insects and termites.
In constructing the old traditional cabin walls, the largest logs were placed at the bottom of the walls, tapering to the smallest logs at the top of the wall. The logs were reversed by placing the log top end of one log directly above the butt end of another log. This method insured a more uniform space between logs. This space between the logs was about two inches, with a minimum space of one inch.
After the logs were placed, chinking of the space between the logs proceeded. Six inch strips of expanded metal lath or heavy, small spaced wire fabric was placed on a diagonal between the logs. The metal strips were securely nailed to the bottom inside face of the top log and nailed to the top outside face of the bottom log. These metal strips were then covered by the mortar that ran continuously between the pgs for the length of each log.
The mortar my family used on our old cabin was a portland cement mortar mix; one bag of portland cement, 20% of lime by volume, and 3 cubic feet of loose plaster sand. These materials were mixed together dry. Water was added to produce a stiff mix. This mortar was allowed to stand for about one hour under a cover of wet cloth, then remixed. No additional water was added to the mortar.
The mortar was then ready to be placed for chinking. The mortar was simultaneously placed into the log spaces from both sides of the wall with compacting tools, pushing the mortar through the openings in the metal lath or wire fabric thus forming an anchor for the mortar.
The compacting tools were wood blocking about ten inches long with convex shaped face to produce a curved concave face to the chinking.
Feather edges against the logs were cut off with a trowel leaving approximately 1/4 inch shoulder on the top and bottom of the joint on both sides of the wall. Two to three hours later, the chinking and logs were painted with water glass (a sodium silicate solution). The water glass film began to peel and flake after several days and was removed with a dry rough scrub brush. The surfaces were then finished with sandpaper and finally stained. This sealed the walls from snow, wind, rain and animals.
In modern chinking (if used), the space between the logs is somewhat reduced. The space is filled with strip foam near the center of the logs and backer rods tight against the foam on each side. Then a synthetic chink is placed tight against the backer rods covering them, the foam and sealing against the logs. This new chink looks and feels like mortar. It is a permanent seal because of the elastic properties of the synthetic chink.
In constructing the old traditional cabin walls, the largest logs were placed at the bottom of the walls, tapering to the smallest logs at the top of the wall. The logs were reversed by placing the log top end of one log directly above the butt end of another log. This method insured a more uniform space between logs. This space between the logs was about two inches, with a minimum space of one inch.
After the logs were placed, chinking of the space between the logs proceeded. Six inch strips of expanded metal lath or heavy, small spaced wire fabric was placed on a diagonal between the logs. The metal strips were securely nailed to the bottom inside face of the top log and nailed to the top outside face of the bottom log. These metal strips were then covered by the mortar that ran continuously between the pgs for the length of each log.
The mortar my family used on our old cabin was a portland cement mortar mix; one bag of portland cement, 20% of lime by volume, and 3 cubic feet of loose plaster sand. These materials were mixed together dry. Water was added to produce a stiff mix. This mortar was allowed to stand for about one hour under a cover of wet cloth, then remixed. No additional water was added to the mortar.
The mortar was then ready to be placed for chinking. The mortar was simultaneously placed into the log spaces from both sides of the wall with compacting tools, pushing the mortar through the openings in the metal lath or wire fabric thus forming an anchor for the mortar.
The compacting tools were wood blocking about ten inches long with convex shaped face to produce a curved concave face to the chinking.
Feather edges against the logs were cut off with a trowel leaving approximately 1/4 inch shoulder on the top and bottom of the joint on both sides of the wall. Two to three hours later, the chinking and logs were painted with water glass (a sodium silicate solution). The water glass film began to peel and flake after several days and was removed with a dry rough scrub brush. The surfaces were then finished with sandpaper and finally stained. This sealed the walls from snow, wind, rain and animals.
In modern chinking (if used), the space between the logs is somewhat reduced. The space is filled with strip foam near the center of the logs and backer rods tight against the foam on each side. Then a synthetic chink is placed tight against the backer rods covering them, the foam and sealing against the logs. This new chink looks and feels like mortar. It is a permanent seal because of the elastic properties of the synthetic chink.
Thursday, March 22, 2007
Selective Logging
When the logger arrived at our place he said "You should have logged the property some ten years ago"
 The logger was right as many of the large balsam, aspen, birch and pine trees have fallen because of high winds, decay and "old age."
I hired a local logger last summer who had a great reputation for selective logging of properties; taking only the most mature trees that needed to be harvested and leaving the healthy, younger trees so they will continue to grow.
The logger had all the equipment to cut, trim and lift the large trees into his large logging trucks. The local processing plants were not accepting any trees for a while, so the harvesting was delayed. The local processing plants use the trees to make home building products, such as wood sheathing. The trees can be also used at the paper mills to create paper for newspapers, magazines, etc.
When cutting down the trees, the logger cuts a wedge-shaped piece out of the trunk of the tree with his chain saw. Then the logger makes a chain saw cut on the opposite side of the wedge-shaped cut. The tree loses its strength and balance and falls toward the wedge-shaped side of the trunk.
 The logger was able to fell the trees exactly where he wanted them. The falling tree avoids striking other trees or hitting stumps, large rocks, or equipment which might damage the falling tree's trunk. He trims the limbs and may cut the tree into shorter pieces. Some pieces may be 30 to 40 feet long.
Our logger created a landing (a central place to collect the fallen trees) and skidded (dragged) the fallen trees to the landing. He then placed the logs on the truck trailer and when the trailer was loaded with the logs, he transported the logs from the forest area to the processing plant some distance away. He also assembled the cut limbs into brush piles and when sufficient snow was on the ground, burned the brush piles.
The processing plant delay was lifted and the logger proceeded to log the property. Logs must be freshly cut when they arrive at the processing plant. Because of the delay at the processing plant, the logging took more time than expected.
The logger did a great job in selectively logging the forest. Now only healthy trees remain, the paths are open and we can see through the trees and underbrush. The forest will now rejuvenate and young, healthy growth will soon cover the land.
I am excited to see what species will spring up, and also I am looking forward to obtaining some small seedling pine trees and plant them this coming spring.
 The logger was right as many of the large balsam, aspen, birch and pine trees have fallen because of high winds, decay and "old age."
I hired a local logger last summer who had a great reputation for selective logging of properties; taking only the most mature trees that needed to be harvested and leaving the healthy, younger trees so they will continue to grow.
The logger had all the equipment to cut, trim and lift the large trees into his large logging trucks. The local processing plants were not accepting any trees for a while, so the harvesting was delayed. The local processing plants use the trees to make home building products, such as wood sheathing. The trees can be also used at the paper mills to create paper for newspapers, magazines, etc.
When cutting down the trees, the logger cuts a wedge-shaped piece out of the trunk of the tree with his chain saw. Then the logger makes a chain saw cut on the opposite side of the wedge-shaped cut. The tree loses its strength and balance and falls toward the wedge-shaped side of the trunk.
 The logger was able to fell the trees exactly where he wanted them. The falling tree avoids striking other trees or hitting stumps, large rocks, or equipment which might damage the falling tree's trunk. He trims the limbs and may cut the tree into shorter pieces. Some pieces may be 30 to 40 feet long.
Our logger created a landing (a central place to collect the fallen trees) and skidded (dragged) the fallen trees to the landing. He then placed the logs on the truck trailer and when the trailer was loaded with the logs, he transported the logs from the forest area to the processing plant some distance away. He also assembled the cut limbs into brush piles and when sufficient snow was on the ground, burned the brush piles.
The processing plant delay was lifted and the logger proceeded to log the property. Logs must be freshly cut when they arrive at the processing plant. Because of the delay at the processing plant, the logging took more time than expected.
The logger did a great job in selectively logging the forest. Now only healthy trees remain, the paths are open and we can see through the trees and underbrush. The forest will now rejuvenate and young, healthy growth will soon cover the land.
I am excited to see what species will spring up, and also I am looking forward to obtaining some small seedling pine trees and plant them this coming spring.
Thursday, March 01, 2007
The Great Room
 When planning the spaces in our log cabin we wanted a spacious, open, bright larger room. We called it a Greatroom.
We focused on entertainment and family living. The Greatroom is a combination of living room, dining room and kitchen with a near smooth vaulted ceiling. The high vaulted ceiling gives the room a nice feeling of space.
 The double hung windows are spaced around the Greatroom and provide an open feeling to capture the outdoors and much needed sunshine. During the evening hours, the vaulted ceiling is illuminated with flourescent strip lighting to cast light up into the vaulted area. Lighting is a key to the success of our great room. There is a five bulb hanging light over the dining table to add some light for evening dining and a table lamp is placed on top of the desk for reading.
The wall finishes of our Greatroom are all wood; logs or wood wall boards with a clear urethane finish. The kitchen cabinets are pine wood and the counter to is red laminate material.
The floor is wall to wall commercial carpeting with a diamond check pattern of green, red, orange, and blue. It is placed on the 3/4" plywood floor sheathing. The carpet adds color to the room.
The black wood stove is positioned on top of a 4" raised platform of green 12" quarry tile. The platform is made of unglazed ceramic tile placed on 1/2" thick cement board with floor tile adhesive. The cement board is supoorted by 2" x 4" wood framing at 16" on center. The size of the platform and the use of non-combustible materials conform to the building codes. This platform provides a base for the major winter focal point: the wood stove with its glass window.
The furniture blends with the rustic interior wall finishes. The dining table and chairs are log furniture made by a Canadian company . Our desk, beds and several other chairs are also made from logs. The couch is dark red leather and one chair is of green textured upholstered fabric. The colors blend well and accent the natural beauty of the logs and other wood construction.
The log stairs with hand- shaped log railings also add a nice rustic look to the furniture and other log construction.
In addition, several wild-life pictures are placed around the Greatroom to add visual interest. We have also enlarged and framed pictures we have taken of the forest. We have winter, spring, summer and fall pictures of one of our favorite areas. Each season displays a different beauty.
The Greatroom is open, spacious and inviting and it is very home-like to us.
Friday, February 23, 2007
Old Log Cabins
 For your viewing pleasure. Some photos of old log cabins of friends, family and local folks.
 Some of these cabins look virtually identical, but if you look closely you can see the differences. Most date
  from the mid 1800's to the early 1900's.
 Please keep in mind that during the Great Depression it was common for people to make a living by trapping and living off the land.


Wednesday, February 21, 2007
Winter Preparations
 We frequently visit our cabin during the winter months, so preparations for winter are fairly simple. We know there will be many days when the temperature drops below freezing and even below zero degrees, so precautions must be taken with anything that can freeze.
 The first items to consider are the food items . We remove all canned and bottled goods as they will certainly freeze. Some dry goods, such as dry soup, flour, sugar, dry cereals, etc. can be stored in metal or glass containers to prevent any insects, mice, etc. from enjoying them. The covers should be tight fitting.
The blankets and bed linens are laundered and those which are not on the beds are stored in a large trunk or hard plastic boxes. (Once we had moths enjoy the flannel sheets and a cotton blanket.) It is too much work to put all the bedding and blankets away each time we leave, not to think of the work in making all the beds when we revisit the cabin.
 As our main source of heat is the wood stove, we always fill the wood box and the log holder on the porch before we leave so that starting the fire will be easier. We also have a kerosene heater which we start as soon as we arrive as the indoor temperature is about the same as outside temperature. We need to be sure we have a good supply of kerosene available.
All the food is removed from the refrigerator. The refrigerator is turned off, disconnected and cleaned with the doors propped open to prevent mold and odor build- up. We have found that our refrigerator starts better if we first turn off the appliance and then unplug it.
 Finally, as discussed in this link to a previous post, the water lines are drained and antifreeze added to the toilet, toilet tank, the sink drains, etc.
Tuesday, February 13, 2007
The Ants Go Marching One By One
As soon as the hornets had been dealt with.....large ants started to appear on the exterior and interior log walls of the cabin. We captured a few of the ants and placed them in small glass containers and sent them to the University of Minnesota for exact identification.
The University Extension Entomologist indicated they were carpenter ants.
Carpenter ants are destructive and can eat up the wood of the log walls. They seem to find the little cracks and openings in the wall and create hidden holes and tunnels within the logs if the wood remains moist and especially if wood rot occurs. Carpenter ants can enter the cabin walls many ways.
At first, we noticed a few ants marching across logs and then found wood shavings, mostly in one particular corner. We realized we needed to be concerned about this issue.
Our first attempt was to apply a liquid insecticide on the inside and outside faces of the log walls. Next, we tried a powder dust especially formulated for carpenter bees and carpenter ants. We used these treatments every 3 to 4 weeks during the summers, less frequently during winter months.
When the log cabin needed a re-staining, we tried an insecticide in the log finish.
In spite of all the attempts to rid the cabin logs of ants, we had little success. One very hot summer we noticed an increase in the number of ants both inside and outside the cabin. As there are many rottings logs in the forest, we could not find their nests in the woods. To our amazement and amusement, we watched as the army of ants marched one by one back and forth across the sandy soil surrounding the cabin. Hundreds of ants were actively working that day.
Something further needed to be done!
We happened upon the cabin's original builder and told him of the carpenter ants. He suggested that I go to a particular small, local store and get a liquid concentrate there which is mixed especially for carpenter ants.
We stopped by the store and asked for the carpenter ant concentrate. The store clerk knew exactly what we wanted and poured a small amount of the mysterious concentrate into an old glass quart jar. The jar cover did not matched the jar. So, in an attempt to seal the improper cover to the jar, the store clerk placed some waxpaper over the opening of the jar before putting on the lid.
We were on our 3 hour return trip back to the city from the cabin when we purchased the concentrate. A number of miles down the road, we were overwhelmed by a strong, pungent odor coming from the back of our van. We guessed it was coming from the jar of concentrate with it's imperfect lid.
 We stopped on a gravel road just off the highway. We couldn't drive all the way back to the city with the smell......how do we do eliminate the smell? We didn't have any other jars or containers in the van with a better closing lid.
After some discussion, we decided to place the jar of concentrate with it's faulty cover under a nearby small pine tree in the forest, about 20 feet from the edge of the back woods road. I placed a flat rock on top of the cover of the jar to hold the jar upright and keep an accidental bump from knocking the jar over. We decided we would plan on picking up the hidden jar on the way back to the cabin the next week end.
A week later we did go back to the cabin and stopped by the small pine tree in the woods to pick up the jar with the concentrate. It was still there! We put it into a new, larger plastic container with a tight cover and continued on our merry way up to the cabin odor free.
The concentrate was to be mixed with water in a 10 to 1 ratio. One ounce of concentrate and 10 ounces of water could be placed into our plastic spray container. We sprayed the mixture into the rock landscaping that surrounds the cabin, on the foundation, lower logs and the wood skirt board that was placed below the bottom wall log. This treatment appeared to be very effective.
Early this coming Spring we will spray this same insecticide to treat the cabin again. Here's hoping the march of the ants is a thing of the past.
The University Extension Entomologist indicated they were carpenter ants.
Carpenter ants are destructive and can eat up the wood of the log walls. They seem to find the little cracks and openings in the wall and create hidden holes and tunnels within the logs if the wood remains moist and especially if wood rot occurs. Carpenter ants can enter the cabin walls many ways.
At first, we noticed a few ants marching across logs and then found wood shavings, mostly in one particular corner. We realized we needed to be concerned about this issue.
Our first attempt was to apply a liquid insecticide on the inside and outside faces of the log walls. Next, we tried a powder dust especially formulated for carpenter bees and carpenter ants. We used these treatments every 3 to 4 weeks during the summers, less frequently during winter months.
When the log cabin needed a re-staining, we tried an insecticide in the log finish.
In spite of all the attempts to rid the cabin logs of ants, we had little success. One very hot summer we noticed an increase in the number of ants both inside and outside the cabin. As there are many rottings logs in the forest, we could not find their nests in the woods. To our amazement and amusement, we watched as the army of ants marched one by one back and forth across the sandy soil surrounding the cabin. Hundreds of ants were actively working that day.
Something further needed to be done!
We happened upon the cabin's original builder and told him of the carpenter ants. He suggested that I go to a particular small, local store and get a liquid concentrate there which is mixed especially for carpenter ants.
We stopped by the store and asked for the carpenter ant concentrate. The store clerk knew exactly what we wanted and poured a small amount of the mysterious concentrate into an old glass quart jar. The jar cover did not matched the jar. So, in an attempt to seal the improper cover to the jar, the store clerk placed some waxpaper over the opening of the jar before putting on the lid.
We were on our 3 hour return trip back to the city from the cabin when we purchased the concentrate. A number of miles down the road, we were overwhelmed by a strong, pungent odor coming from the back of our van. We guessed it was coming from the jar of concentrate with it's imperfect lid.
 We stopped on a gravel road just off the highway. We couldn't drive all the way back to the city with the smell......how do we do eliminate the smell? We didn't have any other jars or containers in the van with a better closing lid.
After some discussion, we decided to place the jar of concentrate with it's faulty cover under a nearby small pine tree in the forest, about 20 feet from the edge of the back woods road. I placed a flat rock on top of the cover of the jar to hold the jar upright and keep an accidental bump from knocking the jar over. We decided we would plan on picking up the hidden jar on the way back to the cabin the next week end.
A week later we did go back to the cabin and stopped by the small pine tree in the woods to pick up the jar with the concentrate. It was still there! We put it into a new, larger plastic container with a tight cover and continued on our merry way up to the cabin odor free.
The concentrate was to be mixed with water in a 10 to 1 ratio. One ounce of concentrate and 10 ounces of water could be placed into our plastic spray container. We sprayed the mixture into the rock landscaping that surrounds the cabin, on the foundation, lower logs and the wood skirt board that was placed below the bottom wall log. This treatment appeared to be very effective.
Early this coming Spring we will spray this same insecticide to treat the cabin again. Here's hoping the march of the ants is a thing of the past.
Tuesday, February 06, 2007
Uninvited Guests
 As soon as the cabin was finished, a number of uninvited guests arrived.
The ants, spiders, hornets, wasps, bees, deer flies and mosquitoes all showed their presence. Of course, the usual insects were there before us and we had to blend into their surroundings.
Summer is their season, but we can escape into the confines of the cabin interior. The screens are on the windows and a big fly swatter is nearby. We put sticky fly strips on the bottom of the high windows.
Everything seemed under control.
But, then the hornets showed up and built their nests at the soffits of the roof overhangs. They make their nests of hornet chewed plant fiber. The nests look paper-like. Every spring we expect a hornets' nest under one of the eaves of the cabin, garage, or wood shed.
The female hornet starts the nest and lays some eggs. The young become mature and become workers for the female hornet helping to build the nest larger, gather more food and have additional hornets. Soon, we had hundreds of hornets.
The hornets can be a needless pest and they can give painful stings to anyone who disturbs them. The stings are poisonous and can cause painful swelling. I have been stung several times by these critters.
I like to get rid of these uninvited guests by using "BLACK FLAG" spray that is made specifically to kill hornets or wasps on contact within their nest.
I dress head to foot with a long sleeved shirt , full length jeans and gloves and cap. I try to keep my neck and face covered as much as possible. At evening time, after sun set, when the hornets become least active, I give the hornet nest a good 2 to 4 second shot of the Black Flag. The spray coats the nest and saturates it, killing the whole nest and any hornets which return to the nest after the nest has been coated. This seems to control the hornet population for most of the season.
Other "uninvited" guests??? Yes!!! ......To be continued.
Saturday, December 30, 2006
Wood Decay
 Wood decay is created by microscopic fungi which feeds on the starches and sugars that are in the wood. The fungi slowly destroys the wood cell structure of the log.
There are several types of decay fungi, but the prevailing cause of log damage is from brown rot. The wood appears brown and crumbly and looks unusually dry. Sometimes this rot is called "dry rot".
 Wood decay fungi requires four conditions to survive: a warm temperature (about 70 degrees to 100 degrees F), oxygen, wood (food source), and water. Keeping the water away from the log contruction is the most effective means of decay control.
 Of course, choosing the proper wood species helps control wood decay too. Wood species such as cedar, cypress, redwood heartwood are naturally resistant to decay and insect attack. The heartwood is that portion of the log that is the central column of wood that runs through the center of the log. The sapwood of the log is that wood that surrounds the heartwood and is less durable in nature. The sapwood is the light colored wood: whereas, the heartwood is the darker portion of the log.
 The historic log structures of Europe, United States, and Canada are grand because of the virgin timber of years ago. These virgin timbers had large portions of heartwood, thus these log structures have stood for years. Some good examples are the Lodges of Yellowstone, Glacier, and Yosemite National Parks.
(Grand Canyon Lodge photo curtesy of the National Park Service. Photo by L.S. Harrison)
Thursday, December 21, 2006
The Anatomy of the Log
The choice of the log species used to build a cabin is determined by availability and the cost. The wood that is indigenous to the local area is a good choice.
It is best to have the logs winter cut and air dried. This will help reduce the overall weight of the logs for shipping and will aid in lifting the logs for construction. It will also help shrink the logs prior to setting the log in the log walls, thus reducing to precautions necessary to accommodate shrinkage and detailing around windows, doors, interior walls, etc.
 When the moisture content of the logs gets below 19%, a large amount of the log shrinkage has been done. The moisture content is best measured by a moisture meter. It is ideal to get the moisture down to 15% or below to be sure the logs won't check. Of course, shrinkage will vary and will reach an equilibrium with the environment, and will have some differential moisture content between the inside and outside of the exterior walls. This differential is most pronounced during the winter.
This leads to the log profile (or how the logs join together). The choice of log profile and the wood species is important because some joining systems work better with some wood species than with others. As an example, Western Red Cedar is easier to cut to very close tolerances, thus making the tight fit between logs.
Another important factor of the log profile is the ability of the log to shed rainwater. If the log is milled to square or other shape other than round, it is necessary that rain water remain on the exterior face of the wall and not enter the joint between the logs.
 The log chosen for our cabin was a Red (Norway) Pine, indigenous to our area and was low cost. Western Red Cedar was an option, but more expensive. The log is curved both on the inside and outside of the log and has a flat top and bottom. The top has two tongues and the bottom has two grooves. The tongue profile matches the groove profile so as to fit together. During erection of the logs, two 1/8" Butyl Strips are placed on top of the two tongues to aid in fitting the joint together. (See photo of the log profile). The center of the log is very near the center of the cut profile which adds to the structural stability of the log wall.
Also, note that at the corners where the logs overlap, the log ends are flush and are not a butt and pass corner. Usually, the butt and pass corners permit weathering of the logs which will lead to log decay.
The log shrinkage in the exterior walls of the cabin was allowed to happen as vertical steel rods were placed in the wall corners and other locations that run the full height of the log wall thru vertical holes placed at the center of the logs. This wall shrinkage keeps the log to log joints tight and keeps the rain water out of the joints.
One possible problem with the double tongue and groove system (shown in the photo) of the cabin is that moisture can form between the grooves, caused by condensation in the winter time. The thin Butyl Strips tend to mitigate this potential problem. After ten years of the logs in place this condensation problem hasn't been detected in our cabin.
As an additional insurance, we applied a high quality stain sealer (High Sierra Log Stain) to the exterior of the cabin and caulking was placed in the exterior corners.

It is best to have the logs winter cut and air dried. This will help reduce the overall weight of the logs for shipping and will aid in lifting the logs for construction. It will also help shrink the logs prior to setting the log in the log walls, thus reducing to precautions necessary to accommodate shrinkage and detailing around windows, doors, interior walls, etc.
 When the moisture content of the logs gets below 19%, a large amount of the log shrinkage has been done. The moisture content is best measured by a moisture meter. It is ideal to get the moisture down to 15% or below to be sure the logs won't check. Of course, shrinkage will vary and will reach an equilibrium with the environment, and will have some differential moisture content between the inside and outside of the exterior walls. This differential is most pronounced during the winter.
This leads to the log profile (or how the logs join together). The choice of log profile and the wood species is important because some joining systems work better with some wood species than with others. As an example, Western
 Red Cedar is easier to cut to very close tolerances, thus making the tight fit between logs.
Another important factor of the log profile is the ability of the log to shed rainwater. If the log is milled to square or other shape other than round, it is necessary that rain water remain on the exterior face of the wall and not enter the joint between the logs.
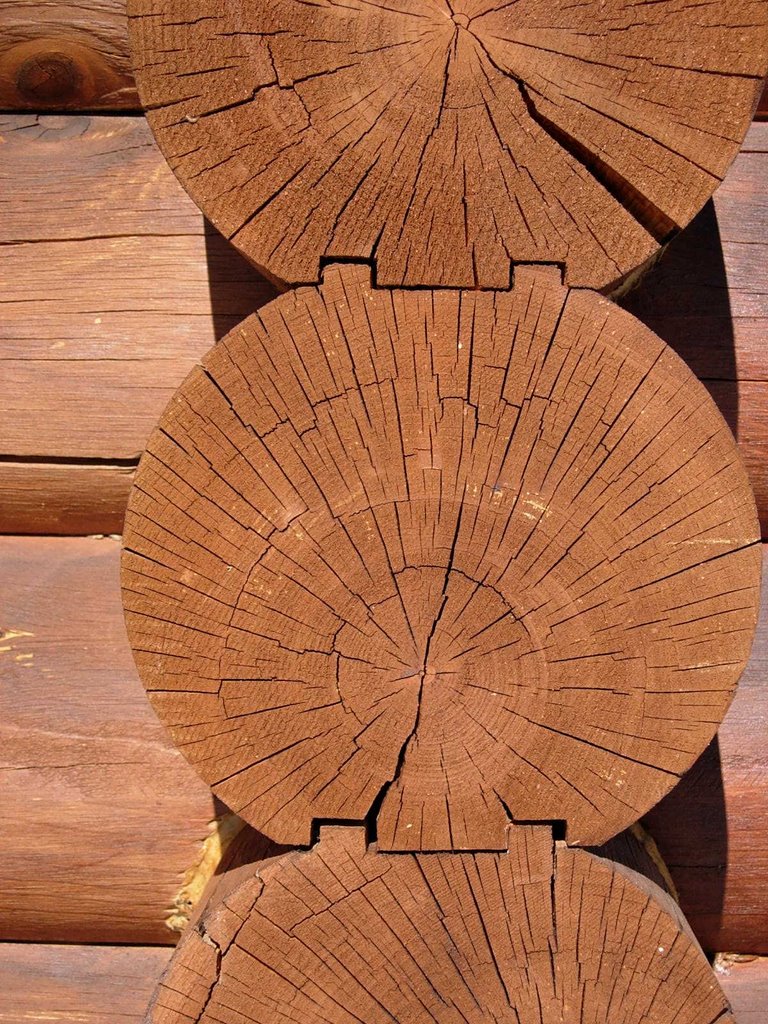 The log chosen for our cabin was a Red (Norway) Pine, indigenous to our area and was low cost. Western Red Cedar was an option, but more expensive. The log is curved both on the inside and outside of the log and has a flat top and bottom. The top has two tongues and the bottom has two grooves. The tongue profile matches the groove profile so as to fit together. During erection of the logs, two 1/8" Butyl Strips are placed on top of the two tongues to aid in fitting the joint together. (See photo of the log profile). The center of the log is very near the center of the cut profile which adds to the structural stability of the log wall.
Also, note that at the corners where the logs overlap, the log ends are flush and are not a butt and pass corner. Usually, the butt and pass corners permit weathering of the logs which will lead to log decay.
The log shrinkage in the exterior walls of the cabin was allowed to happen as vertical steel rods were placed in the wall corners and other locations that run the full height of the log wall thru vertical holes placed at the center of the logs. This wall shrinkage keeps the log to log joints tight and keeps the rain water out of the joints.
One possible problem with the double tongue and groove system (shown in the photo) of the cabin is that moisture can form between the grooves, caused by condensation in the winter time. The thin Butyl Strips tend to mitigate this potential problem. After ten years of the logs in place this condensation problem hasn't been detected in our cabin.
As an additional insurance, we applied a high quality stain sealer (High Sierra Log Stain) to the exterior of the cabin and caulking was placed in the exterior corners.
Friday, November 03, 2006
Lost
 Some years ago, my mother and her friends planned a blueberry picking trip. They knew of a great spot in the woods near the old cabin where blueberries were abundant. The time was late August and the blueberries at the their best.
The blueberries are of low bush variety, several feet high and thick with many green leaves and when in bloom they have white or pink blossoms. The blueberries grow best in sandy or peaty soil that must be acidic and drained to a depth about 16 to 20 inches. The underlying soil below the sandy or peaty soil must have abundant mositure for the blueberries to thrive.
The group was having a great time enjoying the harvest of berries. Each of the group proceeded to pick, going in their own direction, spreading out and following where the best picking was. Soon the group was spread out, far from each other, but still enjoying blueberries. Time passed.
My mother found herself isolated from the group. She thought she could call for help, but there was no response. She walked back to where she thought her friends were, but couldn't find them. Evening was approaching. A little panic settled in.
My mother collected her thoughts and looked for a clearing nearby to sit down and rest. She had a nice pail of blueberries to eat when she felt hungry. Just, maybe, her friends would stop by or call. She waited. Darkness came. She curled up and fell asleep.
Her friends looked for her, calling her name, but could not find her. They called the sheriff's office and explained about the lost person. The sheriff stated that they would form a search party in the morning which included an airplane and pilot who was trained in searching for lost people. The area to be searched was somewhat remote, but well defined.
 My mother was an experienced outdoorswoman and did not wander, but stayed near the clearing where she stopped early the previous evening. Morning came, and my mother awoke to the noise of a low flying airplane. She waved at the pilot and the pilot tipped the wings to acknowledge her wave. Within an hour the search party arrived. Needless to say, my mother was happy to see the group.
When she arrived home, her friends stopped by to ask about her night in the bush. She talked for hours about her adventure. She even got her story in the local newspaper. Mother was an ideal survivor in that she didn't panic, collected her thoughts, sat down and rested, had something to eat, and had a strong belief in her friends who would help in finding her.
Sunday, October 15, 2006
The Wood Shed
When the fall and winter months come to mind, our thoughts go to: "We need to cut some firewood." We have an Avalon wood burning stove that warms the cabin and has proven to be an adequate provider of warmth during the winter. The fuel for the stove is wood from the forest.
In the Spring of the year, we scout about for dead or near dead trees, fell them, and cut the logs into 16" to 18" pieces to fit into the stove fire box. Many types of trees are available, but we have been cutting maple, aspen, ash and birch trees. We prefer the hardwood such as oak, but oak is not available. The need for a wood shed was obvious.
 The 6' wide by 12' long wood shed is located about 8' from the garage. It is placed atop a sloping ledge rock: the same area we originally planned to locate the cabin. It is not the best place, but a good location and convenient.
Building atop the sloping ledge rock was a challenge. A level floor was desirable so, we cut 4 - 10" round forms (sonotubes) to fit the slope of the ledge rock. Jim, a friend who can solve the most difficult of problems, accepted the task of drilling four holes into the ledge rock for the vertical reinforcing rods, 1/2" in diameter. Jim proceeded with an electric drill and 1/2" diameter carbide tipped drill bits. The rock was very, very hard and the drilling very, very difficult. After many hours of drilling and wishing we had diamond tipped drill bits, we accepted about 1-1/2" deep holes. While Jim was drilling the holes, I busied myself by gathering the bags of sack-crete, the wheel barrow, shovel and water for mixing the concrete. We placed the reinforced rods into the holes and poured concrete into the forms (sonotubes). The tops of the poured concrete piers were now level and ready for the wood posts and other wood framing .
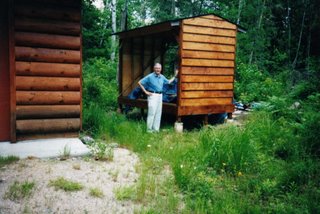 After waiting several days for the concrete to gain strength, we placed 4" x 4" treated wood posts atop the concrete piers and placed wood rafters to form the sloping roof. My daughter and I placed the plywood sheathing over the rafters and applied 30 pounds building paper. Next we nailed asphalt shingles (GAF, Timberline) over the building paper, forming a roof over the wood shed. The same shingles were used as were used on the cabin and garage. We also applied the same stain.
The capacity of the wood shed is about three regular cords of wood, but the usual load is less than 2 cords. It is most enjoyable to sit on the nearby couch and watch the wood burning in the fire box of the Avalon Stove. The heat is a radiant type of heat and feels more comfortable than convection heat. Grab a cup of coffee, a good book and savor the warmth of the stove.
In the Spring of the year, we scout about for dead or near dead trees, fell them, and cut the logs into 16" to 18" pieces to fit into the stove fire box. Many types of trees are available, but we have been cutting maple, aspen, ash and birch trees. We prefer the hardwood such as oak, but oak is not available. The need for a wood shed was obvious.
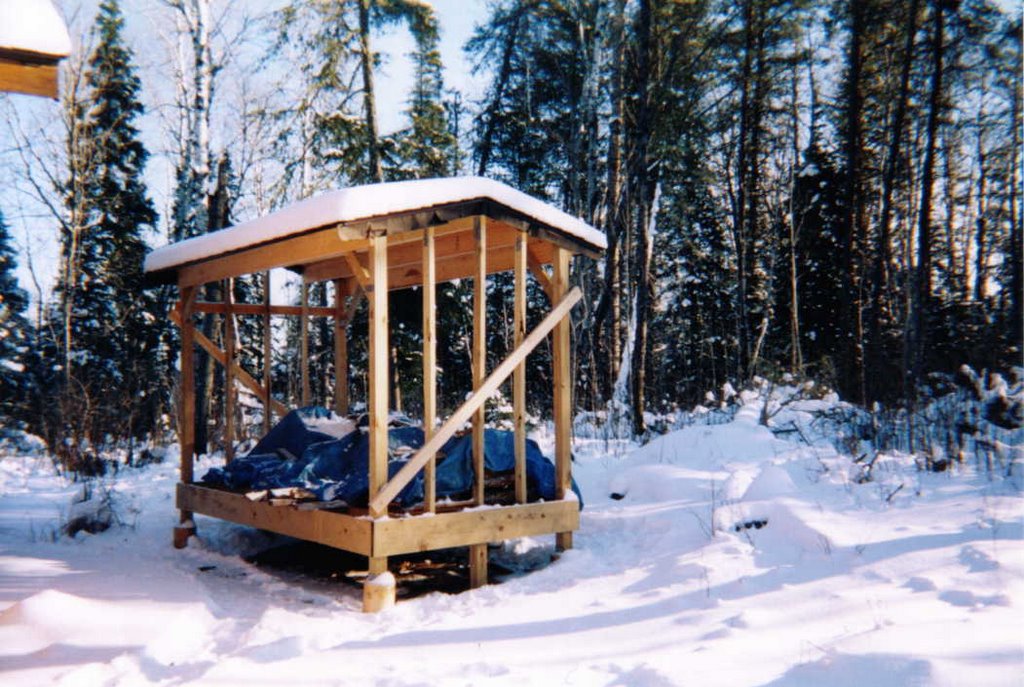 The 6' wide by 12' long wood shed is located about 8' from the garage. It is placed atop a sloping ledge rock: the same area we originally planned to locate the cabin. It is not the best place, but a good location and convenient.
Building atop the sloping ledge rock was a challenge. A level floor was desirable so, we cut 4 - 10" round forms (sonotubes) to fit the slope of the ledge rock. Jim, a friend who can solve the most difficult of problems, accepted the task of drilling four holes into the ledge rock for the vertical reinforcing rods, 1/2" in diameter. Jim proceeded with an electric drill and 1/2" diameter carbide tipped drill bits. The rock was very, very hard and the drilling very, very difficult. After many hours of drilling and wishing we had diamond tipped drill bits, we accepted about 1-1/2" deep holes. While Jim was drilling the holes, I busied myself by gathering the bags of sack-crete, the wheel barrow, shovel and water for mixing the concrete. We placed the reinforced rods into the holes and poured concrete into the forms (sonotubes). The tops of the poured concrete piers were now level and ready for the wood posts and other wood framing .
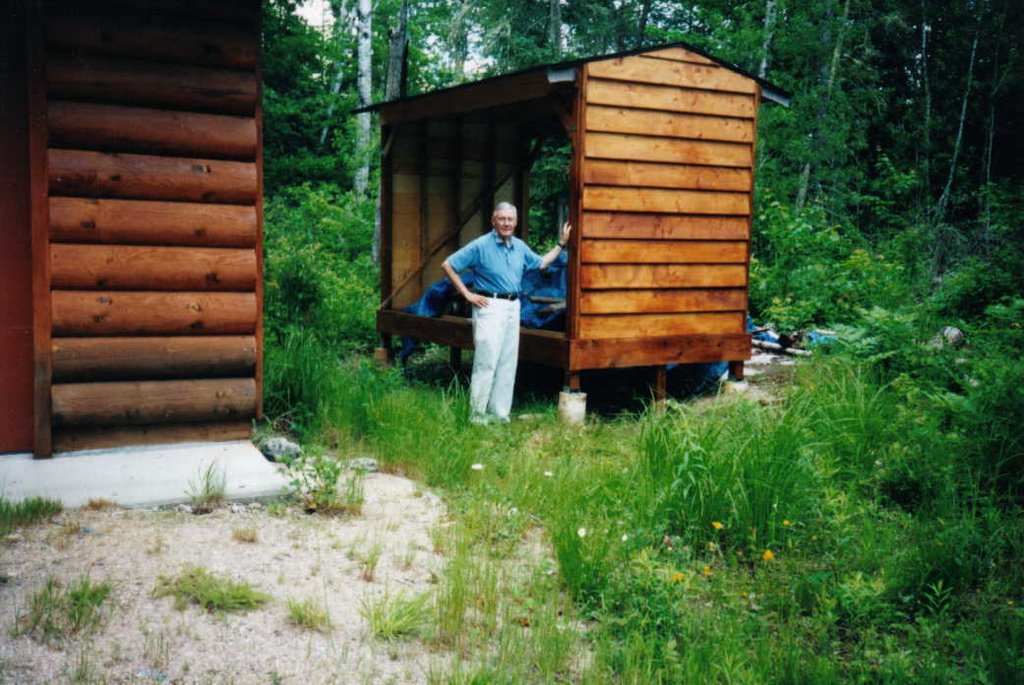 After waiting several days for the concrete to gain strength, we placed 4" x 4" treated wood posts atop the concrete piers and placed wood rafters to form the sloping roof. My daughter and I placed the plywood sheathing over the rafters and applied 30 pounds building paper. Next we nailed asphalt shingles (GAF, Timberline) over the building paper, forming a roof over the wood shed. The same shingles were used as were used on the cabin and garage. We also applied the same stain.
The capacity of the wood shed is about three regular cords of wood, but the usual load is less than 2 cords. It is most enjoyable to sit on the nearby couch and watch the wood burning in the fire box of the Avalon Stove. The heat is a radiant type of heat and feels more comfortable than convection heat. Grab a cup of coffee, a good book and savor the warmth of the stove.
Friday, September 08, 2006
The Boat(s)
 Many years ago, my father owned a home-made 12 foot canvas covered boat with a 2 1/2 horsepower Johnson outboard motor. The boat and motor were used for years for fishing and lake exploration. The boat was light enough to be placed on boat carriers on top of the family car. My father sold the boat and motor in the late 1950's.
In the late 1940's, my dad and I took the 12 foot boat on a week long trip thru a number of large connecting lakes. We camped in a tent on some of the islands, caught some fish to eat and enjoyed being together. When we started out, the weather was nice, a little windy and sunny.
 Later in the week, the wind picked up when we were crossing one of the large lakes. The waves grew into "white caps" and then into large rolling waves., That 12 foot boat did well in those waves. When we went into a wave trough, we could not see land. May dad had that 2 1/2 horsepower Johnson humming along just great. We both had our life jackets on and hoped we would not take on much water. Eventually, we reached a beach near a resort which my dad knew; and there we took on a big splash of water. We were safe and sound and waited out the wind storm at the resort. The people at the resort said that even the big boats would not go out into that wind storm.
After the wind storm subsided, we resumed out trip. On our way back to our point of beginning, my dad suggested that we portage the boat, motor and our gear. The portage was about 1/2 mile and required several trips. We placed a small wheel on top of the top deck at the bow of the boat. We turned the boat over, with the boat bottom upward. We both grabbed the stern transom and wheeled the boat across the portage. Another trip back, and our motor and gear were across the portage. We found the bay was very calm. We continued on doing fine, but the wind slowly picked up as we were going down the center of the bay toward the main part of the large lake.
All of a sudden, the boat landed atop a large submerged rock. The motor stopped and there we were!! We could not move. My dad suggested we get out the paddles.
The paddles were placed vertically, one on each side of the boat. My dad had one paddle and I the other. The paddle tip was placed atop the submerged rock and we waited for a larger wave. After a few minutes a large wave came along and my dad called out that we both push down on our paddles.
Alas the boat came off the rock. My dad started the motor and we both felt releaved and out of danger. The rest of the trip was without any major event.
We arrived at the public dock at our point of beginning . Here my dad ran into an old friend and they talked for at least an hour about our week long wonderful trip and that 12 foot boat.
In the 1970's I purchased a used 17 foot alumacraft canoe. I still have the canoe, but we don't use it much. It is ideal for portaging from one lake to another and for canoe trips.
I thought I needed a fishing boat and a larger outboard motor. A deal came up and I bought a used 14 foot boat with a console control system, a 25 horsepower motor and trailer . Big Mistake!!!
The boat size was too small for the large lakes in our immediate area. It would be okay for the smaller lakes, but not the big ones.
I traded the 14 foot boat, motor and trailer in for a new 16 1/2 foot Aumacraft boat, a new Johnson 25 horsepower and a new Shorelander trailer. The boat was wider and deeper with more stability. The boat came with cushion seats, fish well, storage compartments, night lights and bulge pump. Just enough items to add some comfort.
The 25 Horsepower Johnson is unique as it has 3 cylinders, in lieu of 2 or 4 that other motors have. It runs well, with ample boat speed.
Most of the boats and motors in the marine docks around, are larger with faster and more powerful motors. Motors up to 200 horsepower are not uncommon.
The lakes around our area are numerous; Almost a life time of fishing and exploration. Within a 15 mile radius from our cabin there are 25 different lakes of various sizes and shapes.
Sunday, June 25, 2006
More Construction - The Garage
Almost as important as the cabin is the garage - and storage. The accumulation of more possessions dictated the need for a garage and storage.
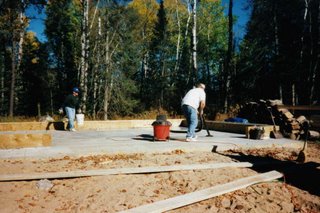 Garage construction is different than cabin construction. Deep foundations, insulation, and interior finishes can be omitted.
A 22 foot by 28 foot garage was built using the thickened edge of the concrete floor as the footing for the load bearing wood frame walls. A compacted sand and gravel fill was placed below the garage slab to support the slab and the garage structure and to keep any frost action from lifting the structure.
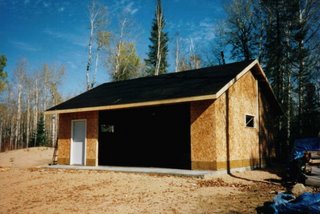 Pre-engineered roof trusses were used to span the 22 feet between the exterior bearing walls. A Micro-Lam beam was used over the 8 foot high overhead garage door.
So often the case, the beams over the 16 foot wide garage doors are undesigned. The potential snow loads on any roof are high in our area, as the building code would require up to 46 pounds per square foot of snow for the design of the roof trusses and supporting beams for garages.
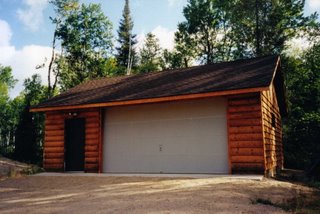 Beveled pine boards were used on three sides of the garage and log siding was used on the front of the structure. The log siding recalls the log structure of the cabin. The stain used on the garage is the same as used on the cabin and the roof shingles are also the same. The service door is painted green to match the door to the cabin.
When the floor slab and concrete apron were poured, I was surprised when the contractor did not use any curing method to help cure the concrete. So, I quickly applied a coating of water over the top of the slab and then a covering of contruction plastic was placed over the entire slab. A curing method should have been applied to minimize potential slab cracking of the concrete which happens when a rapid evaporation of the water in the concrete occurs.
Some small cracking did appear in the slab after a number of days. After about a month of curing, a high quality penetrating sealer was applied (Hydrozo Clear 650). This sealer acts as a water repellent sealer which prevents water, salts, acids and freeze - thaw cycles from deteriorating the concrete.
The 220 volt electric wiring was extended from the cabin into the garage. A number of ceiling lights were installed along with a number of electrical outlets. An outlet was installed near the overhead garage door for a future garage door opener.
The garage is a great addition to the property as it provides cover for a boat and motor and a number of other items, such as a work bench and storage, a lawn tractor and small wagon, snow blower, and of course a place for the family automobile.
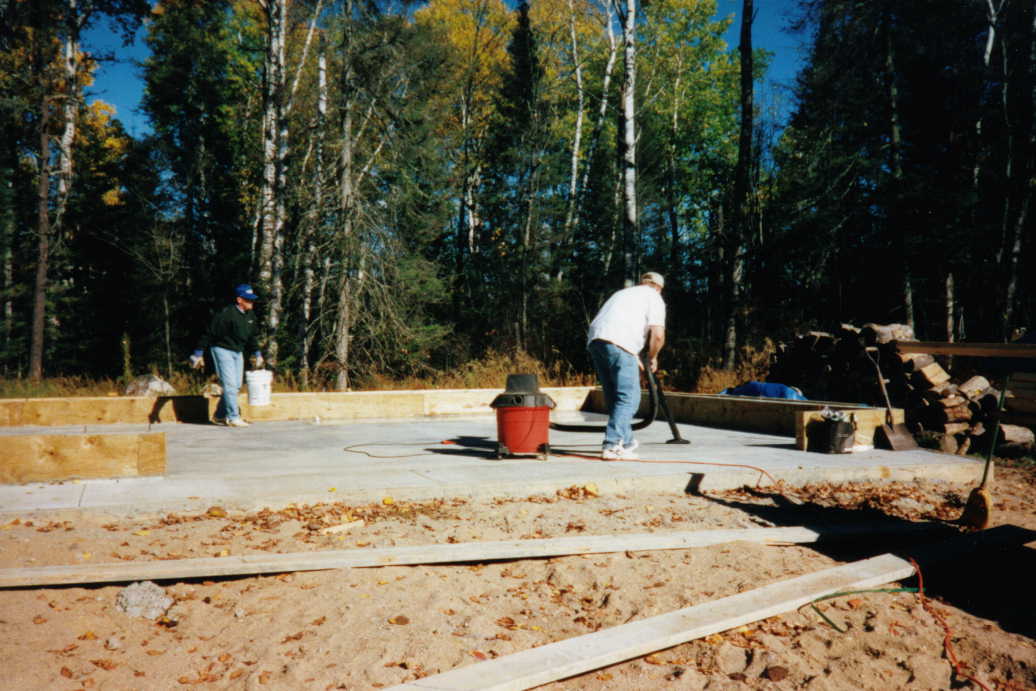 Garage construction is different than cabin construction. Deep foundations, insulation, and interior finishes can be omitted.
A 22 foot by 28 foot garage was built using the thickened edge of the concrete floor as the footing for the load bearing wood frame walls. A compacted sand and gravel fill was placed below the garage slab to support the slab and the garage structure and to keep any frost action from lifting the structure.
 Pre-engineered roof trusses were used to span the 22 feet between the exterior bearing walls. A Micro-Lam beam was used over the 8 foot high overhead garage door.
So often the case, the beams over the 16 foot wide garage doors are undesigned. The potential snow loads on any roof are high in our area, as the building code would require up to 46 pounds per square foot of snow for the design of the roof trusses and supporting beams for garages.
 Beveled pine boards were used on three sides of the garage and log siding was used on the front of the structure. The log siding recalls the log structure of the cabin. The stain used on the garage is the same as used on the cabin and the roof shingles are also the same. The service door is painted green to match the door to the cabin.
When the floor slab and concrete apron were poured, I was surprised when the contractor did not use any curing method to help cure the concrete. So, I quickly applied a coating of water over the top of the slab and then a covering of contruction plastic was placed over the entire slab. A curing method should have been applied to minimize potential slab cracking of the concrete which happens when a rapid evaporation of the water in the concrete occurs.
Some small cracking did appear in the slab after a number of days. After about a month of curing, a high quality penetrating sealer was applied (Hydrozo Clear 650). This sealer acts as a water repellent sealer which prevents water, salts, acids and freeze - thaw cycles from deteriorating the concrete.
The 220 volt electric wiring was extended from the cabin into the garage. A number of ceiling lights were installed along with a number of electrical outlets. An outlet was installed near the overhead garage door for a future garage door opener.
The garage is a great addition to the property as it provides cover for a boat and motor and a number of other items, such as a work bench and storage, a lawn tractor and small wagon, snow blower, and of course a place for the family automobile.
Tuesday, June 20, 2006
What Shall We Fish For?
 June is a good month for fishing in this northern climate. Our favorite fish is the walleye or walleye pike, a member of the perch family.
The walleye pike is common in the Great Lakes and the Upper Mississippi Valley area. The walleye likes clear water with rocky or sandy lake bottoms. Its size may be anywhere between 2 to 20 pounds. The most common length is 10 to 12 inches. The walleye may be caught with a simple pole and hook. It is easy to catch, and will bite almost on any kind of bait and may be caught any time of the year.
 The walleye that weighs about 2 to 3 pounds is the best eating. It has a very pleasant taste for a fish and has few bones.
It is best to fillet the fish before cooking the fish in a fry pan or grilling. My own preference is to grill the fillets.
Of course, northern pike, bass, crappies, etc. are all fun to fish and are good to eat; but walleye pike is the local favorite.
Friday, May 12, 2006
Fishing Opener is May 13th
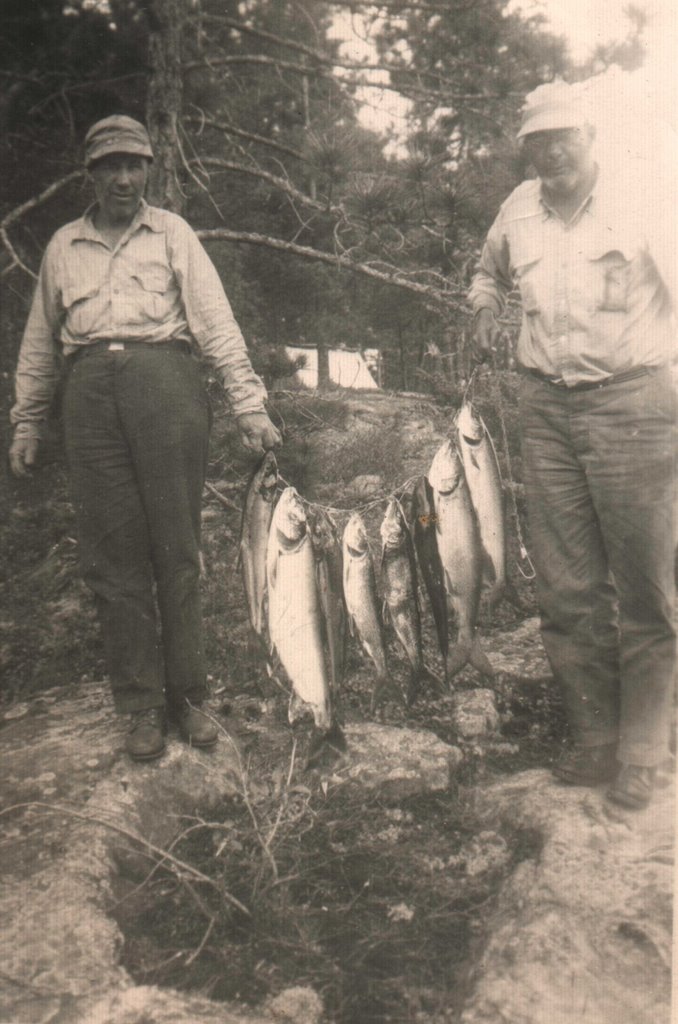 Anglers who are heading to the lake for the Minnesota fishing opener should get their fishing license as early as possible. The DNR stated that those fishermen would avoid long lines and possible glitches.
Vendors, who sell licenses, use a dial-up system to the DNR. The telephone system in some northern commumities recently went down sporadically. The telephone problems have been solved, but overload on the DNR system may happen as thousands of licenses are purchased early tomorrow.
GOOD FISHING!!!!!
Subscribe to:
Posts (Atom)